When did it happen? When did canning jars become all the rage?
They are, you know.
And haven’t they been around for, like, ever? At least as long as I can remember, I know that. (And that’s a pretty long time!)
Now they’re used for crafts, home decor, wedding decor, and parties. Not to mention Mason jar graphics.
I see Mason Jar clip art for nearly every occasion, I think.
There are entire sites dedicated to jars now, like the one my friend Angie has, Crafts with Jars. So many cute ideas!
Since I stuck some peonies in one the other day, I figured it was high time I showed you how to paint a canning jar.
Or Mason jar.
Or Ball jar.
No matter what you call it, this is a super easy way to paint one.
Before we start painting, I want to show you how to make and transfer a pattern.
I kind of hate to admit this but . . . oh well, here it is. It took me years to start doing this – make a pattern for symmetrical shapes. You know, vases, urns, and the like. I didn’t make patterns. I’d just try to eyeball them, sit there and paint them and then get upset when they weren’t perfectly symmetrical.
Somewhere along the line, I got smart and started making patterns then transferred them to the wall for murals or canvas for wall hangings. It seems like it takes more time but, believe me, it’ll save you loads of time in the end.
Not to mention, you’ll have a fairly symmetrical shape to paint.
How To Make and Transfer a Symmetrical Pattern
I started by tracing the outline of one-half of a canning jar I had painted for my BBQ Picnic Printables last summer. Just one side.
I’ve included patterns in this post for you to use and you could just transfer the entire pattern, but if you’re making your own pattern you can use this method, especially if you’re drawing something freehand.
I used tracing paper but regular copy paper will work just as well.
When you’ve outlined one side, fold the tracing paper in half.
I traced with pencil and then went over it with a permanent marker.
 With the paper still folded, slip a piece of graphite paper inside, carbon side facing down, the retrace that half of the jar with a stylus or ball point pen.
 Open the paper and you’ll have a full, symmetrical, jar.
Seems so easy and obvious, doesn’t it? As in, why did it take me so many years to figure this out? Yeah. I know.
Simple things are tough for me. Always have been, always will. Give me something complicated or complex and I’m fine. But something so obvious that a child could do it? I’m stumped.
Moving on . . .
You don’t have to make your own pattern though (unless you want to practice your freehand drawing!). You can download the pattern here.
Or, if you’d like the jar with the Ball logo you can download that pattern here.
I’ll show you how to paint both, with and without the logo, so I transferred the pattern that had the logo. Again, place a piece of graphite paper between the pattern and some watercolor paper then go over the outline and logo with a stylus.
If you don’t happen to have graphite paper handy, you can also turn the pattern over, scribble a pencil over the design and flip it back over, then trace. The pencil leading will work to create the transfer.
If you sew, pattern transfer paper works too. Just be careful about the colors you use as some don’t come off easily.
 After I transferred the pattern I went over the jar outline with a marker. This is totally optional but I like to use markers for detailing.
You’ll notice I didn’t transfer the ridges on the mouth of the jar. This was because graphite paper often leaves dark marks, even after erasing, and I didn’t want any dark lines there, just paint.
I also didn’t go over the logo with the marker at this point.
Now we’re ready to paint!
How To Paint a Canning Jar
You saw from the photo at the top that I painted the jar in blue. It can be any color, of course, even clear which would entail painting it in shades of grey.
Not as much fun and also a wee bit harder. We’ll paint some clear glass one of these days.
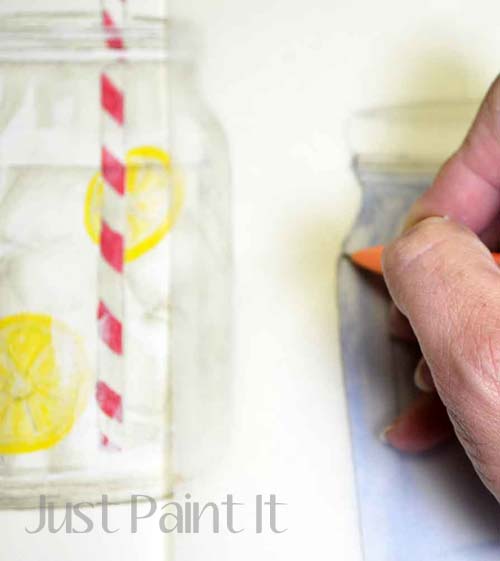
Another note – if you want something to be inside of the jar like flowers or a straw, hearts or whatever, you’ll need to transfer and paint those first. That is, if you want it to look like they are inside of the jar, meaning the blue would be over the top of whatever is inside. Look at the peonies I just did and you’ll see what I mean.
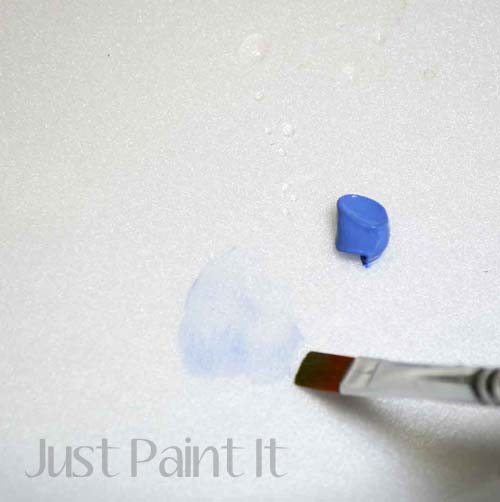
 The blue paint I used is Light Periwinkle by FolkArt. I took just the tiniest dab of paint with a whole lot of water to get a very pale wash, as you can see in this pic.
It’s so much easier – and better – to add more light layers than it is fewer heavier coats. Especially if you’re painting a glass object.
Of course, if you want an opaque look, then go right ahead and paint the jar out any color you want! (But at least try this. Just for funsies.)
 You can see how pale the first layer is. If you get some striations – stripes of paint – don’t worry too much about it. You can always smooth it them out with a clean damp brush. But a little variation in color tint provides visual interest too.
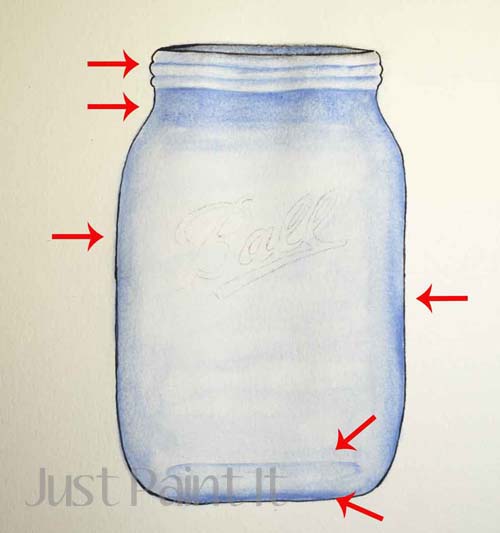
 For the second layer you want to create some ridges at the mouth of the jar, go a little deeper right at the neck under those ridges, as well as along both sides. Then add a little more paint at the very bottom of the jar, as well as a little half circle to create the bottom of the inside.
What we’re doing is adding deeper color where the glass appears thicker – on the sides and bottom.
 To further accomplish this, add another ‘line’ on either side, close to the edge but not right next to it.
You want this ‘line’ to be just a suggestion so once you’ve painted it, go over it again with a clean, slightly damp brush to mottle the line a bit and remove any obvious edges.
That’s all there is to painting the jar. Well, unless you want a lid. Huh. I didn’t even think about a lid. Sorry ’bout that.
Now, if you want to add the logo, let’s keep going. It’s not hard, but it does require some patience.
I thought about doing a full-out shaded tutorial . . .
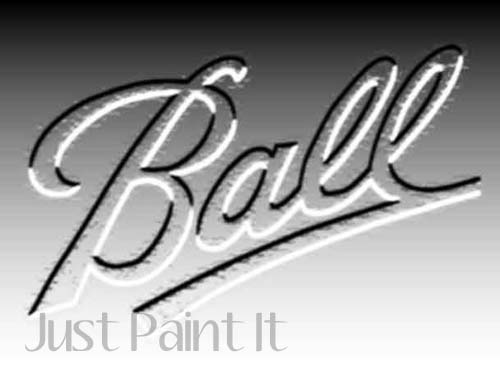
 and created this relief in Photoshop. But with the jar being only 5 inches tall, the lettering is too small to mess with all of that.
Trust me.
So we’ll just outline the logo with diluted blue paint.
I will say that if you have some floating medium, that’ll help a lot because you might need to ‘erase’ some paint here and there and the medium gives you more time than just water.
You can do it with water too, just work in small sections and have a clean, damp brush handy for any mistakes.
 Here is a close up of mine. Definitely not perfect.
 But when you look at the entire jar, it looks pretty good.
After looking at it for a bit, I decided to add some permanent marker to the mouth, the sides and the inside bottom. It’s totally optional whether or not to add the marker.
I used a Micron .08, which is a very thin marker.
 After adding the marker on part of the jar, I felt I needed to do the logo too and used a Micron .005, a very, very thin marker.
Because I’m a fan of detailing with markers, I like this look, but you could certainly paint the jar without any marker at all for a softer, less defined look.
Now you’re all set to paint your own canning jar! If you have a party coming up, go ahead and paint your own graphics – and if you add something to the jar, I’d love to see what you come up with!
Colleen


Hi Colleen, I am a beginner so this is probably going to sound like a really stupid question. You painted a canning jar but not the real life jar right? The illustration shows a watercolor painting.I am totally confused about how one actually applies the pattern to the jar for decoration. Thanks
Hi Tracey, not a stupid question at all. Actually I battle with that all of the time because I could just as easily paint an actual jar as I could paint a painting of one.
This is for painting a replica of a jar on watercolor paper that you could use to make your own clip art or just as a piece of art to hang in your home.
Hope that clears it up. Thanks for asking!
Thanks Colleen. BTW I ran across your site a few nights ago. I’ve been painting canvas for a few months and was looking for some ideas. You opened my eyes to all these other painting ideas and I spent 3 hours at Michael’s yesterday getting supplies. I didn’t even know there were patterns or what graphite paper did (I’ve been cutting out the shapes of things and then taping to canvas and tracing the outline that way, that’s how I did it in high school (30 years ago). Looking forward to class in May.
I still will use templates and trace around them from time to time. But, yeah, graphite paper makes things a lot easier, especially if you want to grab some stuff off the internet. I still like drawing shapes by hand though and am working on a few collections for people to use.
The Jars all became popular when we all decided to heck with canning, we’ll use them for a vase! Before that we all ran from them!! Lol. But my childhood memories of pickling cucumbers, puttin’ up tomatoes and green beans, with my Mom, I’ll hold deep in my heart.
Hugs, Colleen! Laura
That’s funny, Laura. I haven’t canned a leaf . . . ever. Must’ve been the sweat pouring off of Mom’s brow I saw as a young girl that worked as a deterrent, rather than inspiration, haha.
Whatever the reason, these things are crazy popular and it doesn’t look like it’ll be waning any time soon. Maybe we should paint some actual jars now, huh? Thanks for stopping by!
the ‘ball’ logo has been moved, but it didn’t say where it move to ~~ can you help?
Hi Pansy, I just re-linked the pattern with the “Ball” logo so it should be okay now. Sorry about that. I have no idea why it wasn’t working.
Let me know if you have any problems. Thanks~ Colleen
work is beautiful! I am impressed. I am a senior citizen, retired and started painting as a hobby.
Thank you so much, Gail. I’m planning on offering video classes soon. “soon” lol. But keep painting and enjoying it!
Colleen