
Ah . . . Fall. My favorite season.
When trees turn from green to gold to red. When grasses lose their verdant lush green and turn into natural dried stems. Nature has a magnificent palette of colors, from neutrals to burgundies, all on her own.
I couldn’t wait to start decorating with wheat stalks, eucalyptus, oak leaves, and maybe a few cattails. I picked up some bronze mums and mini pumpkins.
And there they all sat . . . waiting. Waiting for this ex-florist to pull out her wire cutters and floral tape and start designing arrangements for every corner of the house.
Except I saw these . . .

Beautiful beaded capiz shell pumpkins from Pier 1 . . . in their catalog! I didn’t even see them in their store because I can’t remember the last time I actually went shopping somewhere other than Safeway or Walmart so I shop online and by catalog.
But I saw them last summer and they stuck in my head.
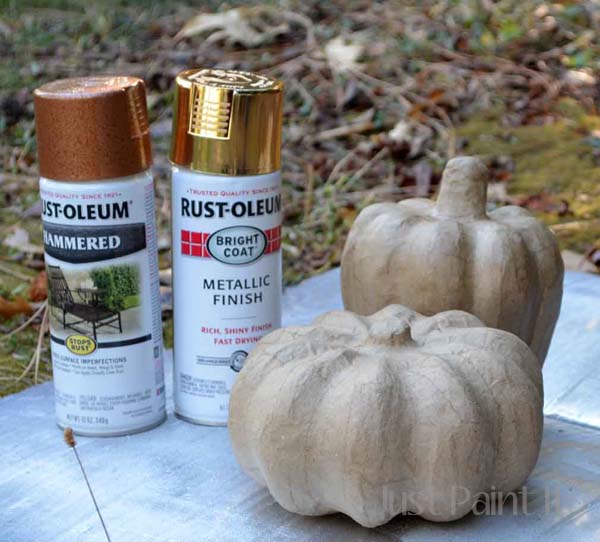
Lo and behold, buried in my stash of Fall, I found these papier mache pumpkins I bought who knows when. A basecoat of shiny gold with a couple shots of copper started things off.

Even though the copper said “hammered”, since I only sprayed a light coat, there weren’t any divots that you’ll usually those kinds of spray paint.

When I looked thru my glitter stash I found these little vials I’d picked up at T.J. Maxx – again, who knows when – and that one teensie vial had a coppery shimmer to it.

From here, it’s really simple with just a few supplies:
- Mod Podge in Gloss
- copper glitter
- old paintbrush to apply Mod Podge
- soft paintbrush
- wax paper with crease in middle
- vessel to use as pumpkin stand while adhesive is still wet

Coat one segment of pumpkin with Mod Podge, sprinkle glitter over Mod Podge – on top of creased wax paper.
Then set pumpkin on little ‘pumpkin stand’ and move on to next section.

A spoon is helpful to pour directly onto areas that need covering.
A little plastic spoon that you get from Apple Hill with a delicacy known as caramello – soft toffee surrounding a marshmallow – helps put you in the Fall spirit.
Just make sure all of the toffee is removed from little spoon . . . which shouldn’t be a problem.
As a matter of fact, the little container the caramello comes in makes a perfect pumpkin stand.
Recycling at its finest here.

Once the Mod Podge has dried, take the soft paintbrush and remove any glitter dust.
This is totally optional, by the way. The dust adds an extra dimension that I just now realized might’ve looked nice if I’d left it alone.

But I didn’t because, in my mind, this was a Pier 1 capiz shell knock off pumpkin.
Of course, they used beads, not glitter. And capiz shells, not hammered spray paint.
Details, details.

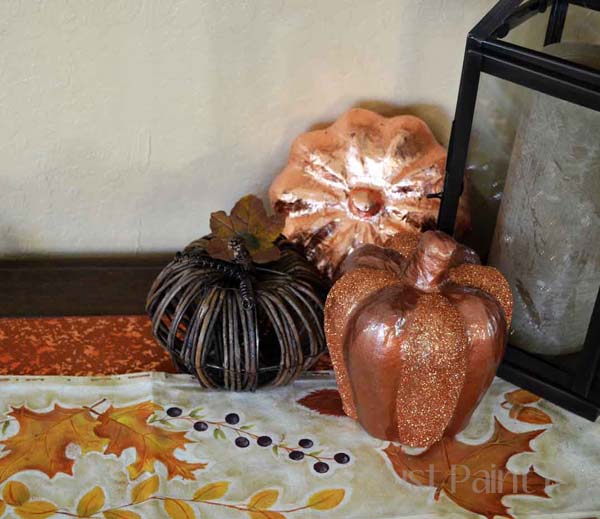
I happened to like love my glittered pumpkin just as it is.

Of course, one glittered pumpkin also meant that I had to move the demilune table that had been here under this mirror for over a year, pull over my brother’s sofa table, and drag out umpteen candles, vases, runners, etc., to see which looked best.
 I still haven’t made my mind up yet, other than the little Fall Leaf runner I painted – you guessed it – who knows when.
The colors in the runner work perfectly with the glittered copper pumpkin.
As for the shiny pumpkin behind the glittered pumpkin, well, that tutorial will come later . . .
when I find a spot for it.

For now, Glittered Copper Pumpkin gets center stage on this table.
Thank goodness I have plenty of room left for Shiny Pumpkin and wheat stalks, eucalyptus, and oak leaves.
How are you doing with Fall decorating? Just started? Or completely finished? Don’t tell me if you are. Just kidding. I’m late this year and I don’t even care because I’m really enjoying moving and rearranging and moving things around in the house.
Colleen
Fall is my favorite season also. I am happy to see you creating and moving forward…a day at a time.
Best wishes..