I wanted to write this holiday decorating series because, while the majority of the year I have a paint brush in my hand, from Fall thru December the florist in me comes out.
Having worked in a craft store for years, I find that’s true with a lot of people. When holidays roll around, we all want to decorate our homes and a good portion of the decorations involve some type of floral – wreaths, garlands, trees, centerpieces.
We want our decorations to look great, of course. Magazines, blogs, and even soap opera sets provide wonderful inspiration.
What? You didn’t realize that about soap operas? My husband – an avid fan of many soaps – always wanted “more lights, more lights” even though I’d try to explain that our home was not a stage set.
Anyway, wanting to get that ‘designer’ look and actually achieving it can be two different things. Floral (and interior) designers often decorate homes for showcase tours with either large budgets or much of the merchandise is used in exchange for advertising. They achieve lush, full Christmas trees, wreaths and garlands using top of the line products.
Those of us at home don’t have this luxury but still want that ‘designer’ look. Even without an unlimited budget you can create beautiful floral pieces with just a few simple tricks of the trade.
Today we’re going to start with design basics, even though we’re already late into the season. You can either pin this for next year or if by some chance you haven’t started decorating, you might find this helpful. This is a comprehensive post, meaning it’s long and wordy. But I want to give you as much information as I possibly can so that you can have fun making Christmas decorations with a designer touch.
General Holiday Decorating Basics
Pick a Theme
Themes are not a necessity by any means, but they can be helpful to keep your spending in check. If you can incorporate existing decorations, all the better. A theme can be something as simple as a color or a pattern or a particular novelty.
Deer heads, anyone?
You can choose a theme for a specific area, an entire room, or only one piece. It’s just like any other type of decorating – you start with an inspiration piece, color or pattern and build from there.
Theme Ideas
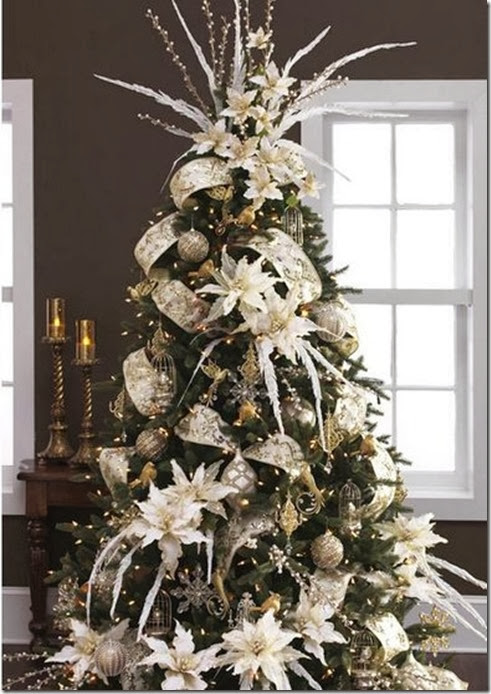
- Elegant – lots of metallics, glitter and shine
- Rustic Woodland – organics including twigs, rust, pinecones
- Classic & Traditional – you can’t go wrong with reds & greens
- Winter Wonderland – whites and snowflakes and touches of either gold or silver.
- Brights – peacock blue and lime green are a stunning combination
- Old-Fashioned Country – calico prints, vintage Santa’s
- Romantic Vintage – lace, antiques, distressed wood, roses
- Garden Glory – seed packets, gardening tools
- For The Birds – I once decorated a 9’ tree in nothing but birds, birdhouses, burgundy velvet ribbon & sheer lime green. It was stunning.
- Family Photos – Another tree was decorated in nothing but ribbon and family photos, large and small. It took a little finesse to get the larger frames secured but the result was fantastic.
I could go on and on but you get the idea. Look at catalogs – Pier 1, Pottery Barn – and notice how they set up their vignettes. Or any retail store. You can get great ideas for themes from the way companies merchandise their products.
Also, make sure you don’t get so hung up in a theme that you have to have one item or another, or a particular product can only be used in one vignette or piece.
Themes are to make your decorating easier and give your interior a pulled together look. There’s no need to over-complicate decorating for the holidays.
Choose The Areas to Decorate
Where in your home will you decorate? When I worked with brides, we’d walk the church and reception sites, looking for the best photo ops. They were areas that were either beautiful already and would be enhanced with floral décor or were in dire need of some camouflaging.
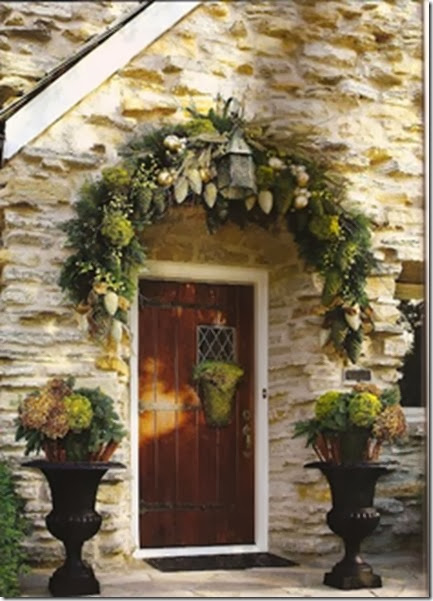
Our homes can be looked at the same way. Get a notepad, walk thru all the rooms – don’t forget the outside too – and decide where you’d like to decorate.
Would twinkle lights brighten that corner?
If you put a wreath on that mirror, will that draw attention away from that spot you don’t want anyone to see?
Spend some time identifying areas to decorate and it’ll not only save you money, it’ll give you a plan which will also save you time and perhaps even a little sanity.
Basic Floral Design Supplies & Tools
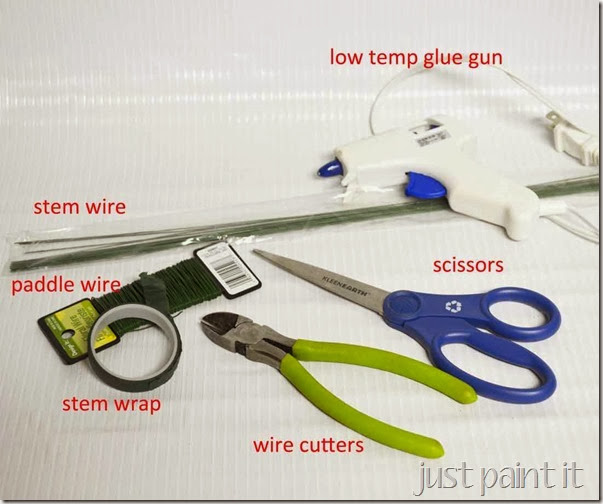
- wire cutters
- scissors
- glue gun (low temp)
- florist tape (optional)
- 20 gauge wire – it’s nice to have both ‘stem’ and paddle
- 3M removable hooks (for hanging wreaths, swags & garlands)
Design Elements
In any type of floral design – holiday or otherwise – there are traditional elements in each design, whether you’re decorating a wreath or anything else.
Keep in mind these are only suggested guidelines and totally open to your own taste and interpretation.
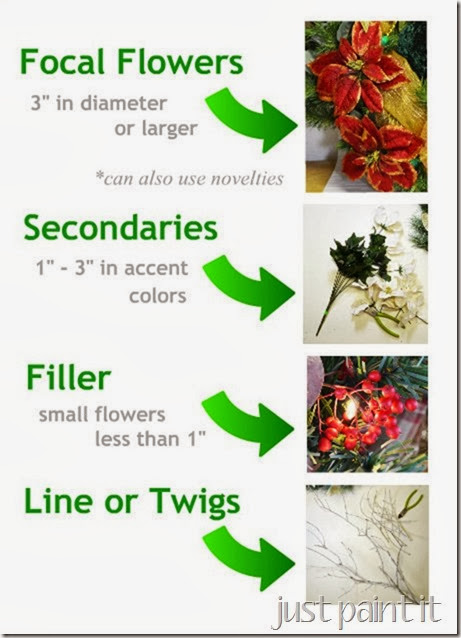
Focal Points – large flowers (3” in diameter or larger) in a dominant color for your theme. A focal point could also be a novelty item (see below).
Secondary flowers – between 1-3” in accent colors
Filler flowers – anything smaller than an inch
Line flowers or twigs – anything long and thin, like birch branches, that help to define the overall size and shape of the design as well as add visual interest
Ribbon and/or Fabric – fabric can be cut into strips and used just like ribbon
Novelties – Christmas ornaments, birdhouses, anything that adds a festive touch to your piece
Textures
When choosing products for your floral designs you’ll want to keep textures in mind. Is there sheen, like satin, or nubby, like burlap, or sparkle, as in glitter. Different textures add great visual interest.
Let’s Go Shopping
Once you have your theme(s) in mind, along with an idea of the areas you want to decorate, you’re ready to go to your local craft store, thrift store, fabric store, or wherever you like to shop. Great items can be find in unlikely places if you keep your mind, and eyes, open.
Working at the craft store I decorated approximately 20 different themed trees each year, each one to showcase a specific line of ornaments the buyers had purchased. If I hung only Christmas ornaments in a tree, it’d be empty by the end of a shopping day from customers plucking them from the branches. I had to fill the centers of the trees so they’d remain full and lush, even if ornaments were missing.
I’d grab a shopping cart, or two, and go ‘shopping’, heading first to the fabric department, looking for texture and color. I’d go up and down each aisle, whether stocked with Christmas or everyday merchandise, seeking colors and textures for a particular theme.
Pick your base –
A base is the anchor of your design – wreath, garland, tree, whatever.
There are lovely styles now, but the nicer a piece, the higher the cost. If you don’t want to add much of your own decorations, then investing in a higher priced base might make sense.
I buy the cheapest available, also the plainest, because I enjoy adding my own decorations, usually different each year. If I need more garland or another wreath, it’s easy to find a plain one. If you need to add more garland and you have a glittered one, it can be hard to find one to match.
I also use inexpensive garland to create swags and tabletop centerpieces, which saves a lot of money.
Start with fabric –
Satin, tulle, sheer organza are wonderful choices for an elegant theme.
Velvet works well in many styles, as does burlap.
Calico is great for country designs.
While fabric stores obviously have the largest selection, you might come across the perfect style in a tablecloth or even a sheet. Again, know your theme and keep your eyes open.
Because fabric is either 44-45” wide up to 60” wide, it’s really economical. You can cut it into strips, as wide as 22” for trees, down to 8-10” wide for trees and garlands, or even 1-2” strips.
For a country look I once cut calico into 1” strips, frayed the edges and tied them onto the tree branches. Looked great.
Many times one novelty will be the starting inspiration, but not always. Sometimes I can’t find Christmas flowers in the colors I want so I’ll pick an everyday varietal, just for the color.
Buy bushes –
When it comes to flowers – of any kind – look at bushes first, where there are multiple blossoms. It’s much more economical and by cutting the bush apart into independent stems, you might have enough flowers for multiple pieces.
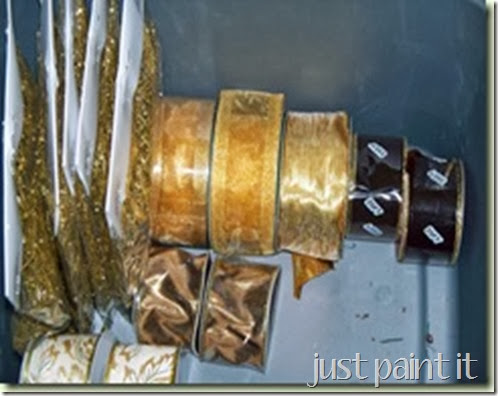
Ribbon –
I like to use more than one type of ribbon in any given piece but the cost can add up quickly. Later on in this series I’ll show you tricks to make your ribbon go farther.
If possible, buy different textures of ribbon. Satin, velvet, matte. Even if it’s in the same color family.
Designer “Extras” –
Since you can’t always find flowers in the color your want or maybe the perfect sized novelty, you can always “create” your own.
If you have a few different cans of spray paint in metallics, glitter and/or your theme color, you can quickly transform a thrift store item into the perfect novelty, or pinecones, or branches, or glass ball ornaments, or . . . you get the idea.
Gee, have I left anything out? I know this probably seems like a ton of information and I certainly don’t mean to overwhelm you. But, having the right “tools” for any job, makes a successful result a lot more likely.
When it comes to decorating for Christmas, having a plan and a overall theme will save you loads of time and money.
Now all we need to do is put all of the pretties together! Next time we’ll talk all about Christmas wreaths. Then later we’ll look at
- garlands
- trees
- tricks with ribbon
By the time we’re done, you’ll be able to decorate like a pro!
p.s. I’ll be using a lot of my own decorations as examples for this series. You can see this year’s decorations in my Christmas Home Tour here.
Colleen





Leave a Reply