There’s only one day left to enter the Modern Masters Paint Giveaway! Have you entered yet? Don’t miss out!
I have a little problem that I don’t talk about too much – people often assume because I can draw and paint some stuff that I’m probably pretty good at most anything creative.
And they’d be wrong. Really, really wrong, believe me.
Truth be told, I have a pretty narrow repertoire in the creative fields. The thing is, after all of this time . . . ‘half a century’ sounds ridiculously ancient . . . but it’s true . . . I’ve tried and failed and tried something else and failed and tried again and achieved . . . mediocre results. Often.
I know what I’m pretty good at and I tend to stick to only those things. Except for every once in a while.
Every once in a while someone wonderful like the people at Royal Design Studio create a new product like their Stencil Size.
And I forget those 50 plus years with all of their trials and errors and limited successes, but more often complete flops, and I get as excited as an 8 year old with a new box of 64 crayons with those perfectly sharpened tips.
I forget that stencils and me . . . well, we have a newfound friendship, even though in the past they were part of more failed projects than I like to remember.
I forget all of that because I just can’t wait to play with my new creative toys – a jar of clear Stencil Size, beautiful, shiny Copper Leaf, and Paisley Wall Stencils that make me swoon.
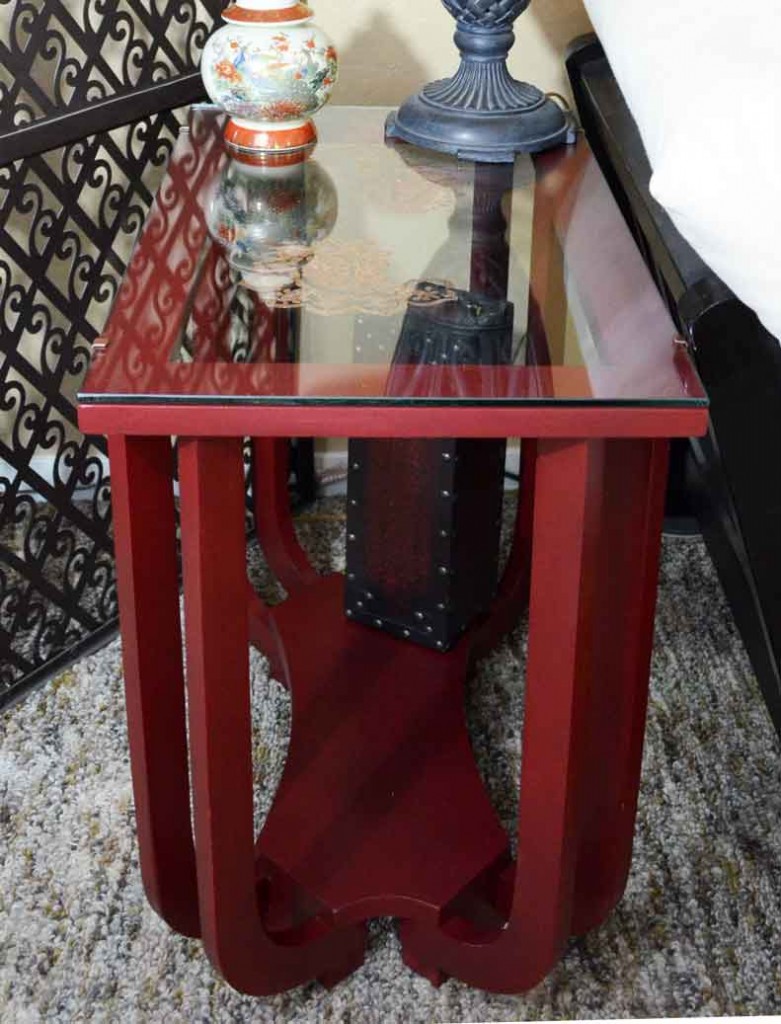
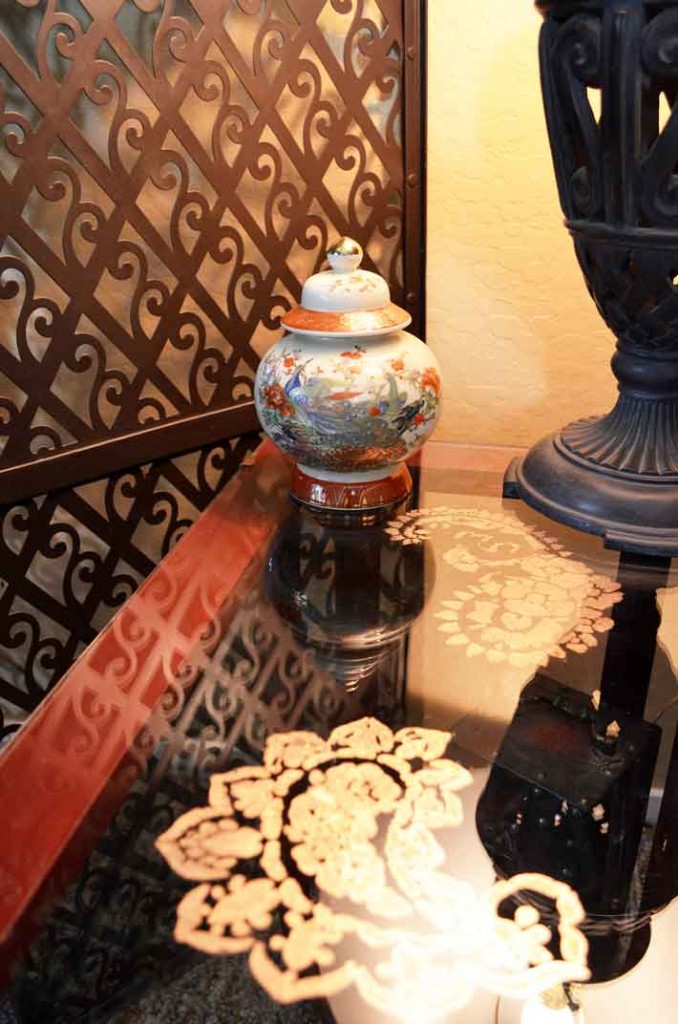
I decided that my brother’s poor, sorry-lookin’ table would be absolutely stunning after a fresh coat of paint and its glass top shimmering in warm copper paisleys.
Never mind that I’d completely sworn off painting furniture EVER again until I recently painted my desk with chalk paint.
Never mind that this is definitely not chalk paint but rather a sample pot I’ve had stuck away for a while, that I chose to use anyway because I couldn’t wait to get chalk paint in the right color.
I had new toys and I wanted to use them . . . now!
Along with my brand new toys I used some other supplies to stencil the glass tabletop with copper leaf:
- stencil size
- copper leaf
- sheepskin or soft powder puff
- soft paintbrushes
- tweezers
- sealer
Painting the table went surprisingly well. Other than the color looking a little more berry than I wanted, but I figured I could antique it when it dried to warm it up a bit.
Once the paint dried though, the color was perfect. Absolutely perfect. Valspar Spanish Tile did not let me down.
There may be hope! Onward and upward to the copper leafing . . .
After cleaning both sides of the glass tabletop and allowing it to dry, I taped off the area where the wood base frames the glass. Then I positioned two of the paisleys and taped them down.
This was my second stenciled sizing, not my first. ahem.
The instructions on the size say to “apply a thin, even coat of size through a stencil. Wait 10 minutes, and then apply metal leaf or metallic foil, either with or without the stencil in place.”
They go on to say, “Use 2 coats of size first, if needed.”
Guess who didn’t see that last sentence? Seriously. I’ll give you three guesses and the first two don’t count.
You’re wondering why that would make such a big difference, aren’t you?
I’ll continue . . .
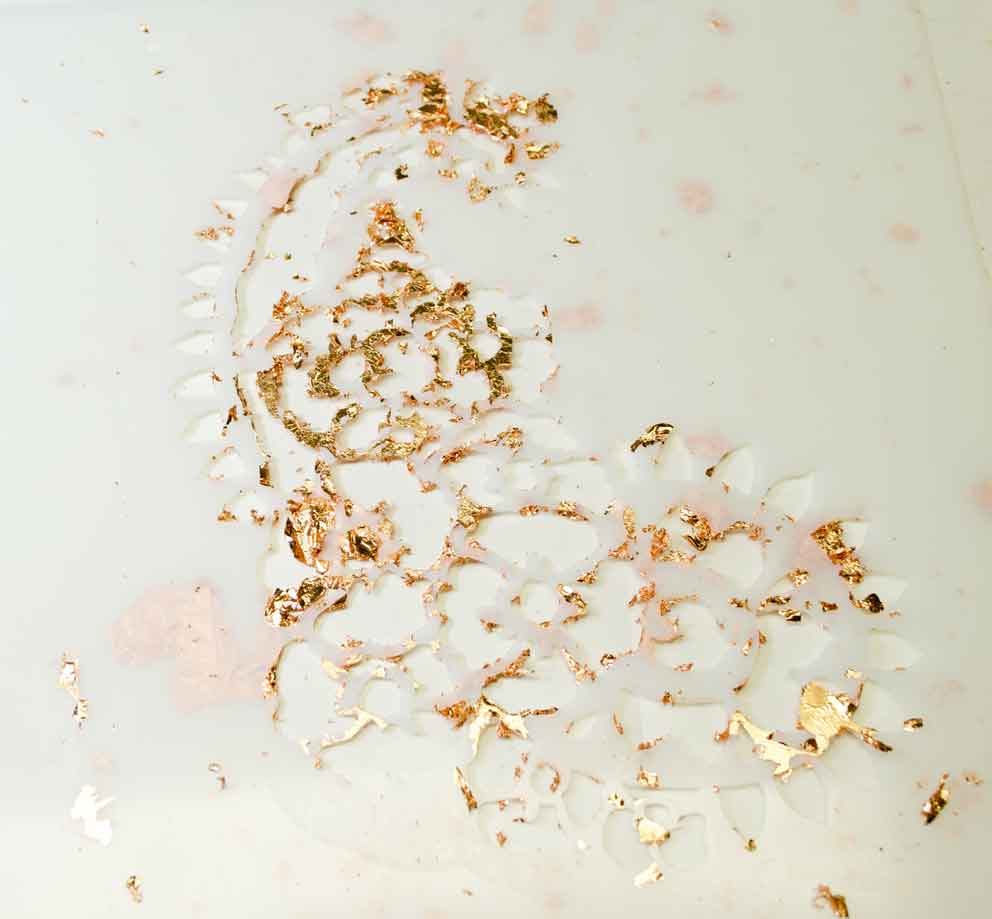
This is what the stencil looked like when I applied the copper leaf on top of the stencil and size . . . after a lot . . . and I mean a lot of clean up.
First attempt at stenciling copper leaf = Fail.
Did I go back and reread the instructions? Of course not. I did some web research and realized that I didn’t let the sizing set up long enough. While I let it set for 10 minutes, it was rainy and damp that day and the humidity was most likely a factor.
On to the second paisley. I let the size set up for 15-20 minutes.
I put the copper leaf directly on top of the size, not on top of the stencil, gently pressing with my fingers and then a soft powder puff.
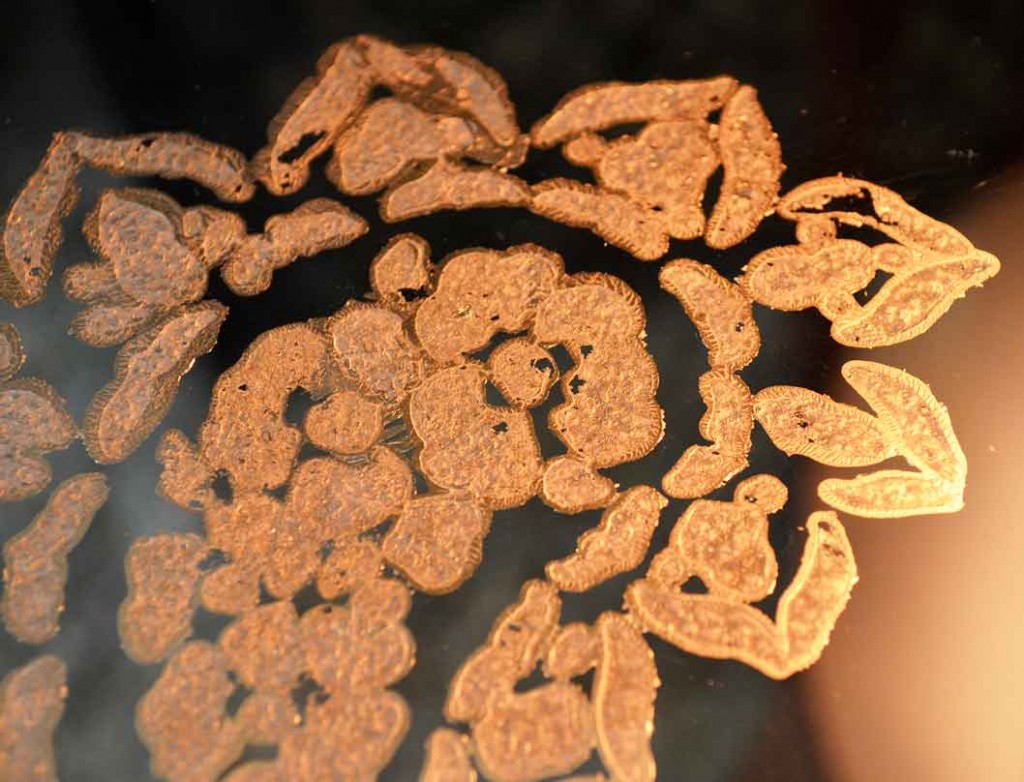
You might not be able to tell from this photo but you could see the paisley pattern thru the copper leaf. The little wrinkled parts were what needed to be removed, the pebbled parts were what stuck to the size.
With a very soft brush I gently brushed away the leaf that wasn’t adhered to the size.
However the design I chose, that fabulous paisley pattern? Yes, well, that is a very intricate design with teeny tiny nooks and crannies that were best removed with tweezers.
If I pressed too hard with the brush, I’d remove some of the copper leaf and the size. No, I don’t think I let the size set up long enough. Obviously.
And let’s not even talk about how originally I thought I’d just slap down some size, then a piece of leaf, press it down and, presto-chango, pull up the stencil!
That’s exactly what I did the first time, the first time I did not photograph, the first time that required a whole lot of picking off copper leaf off of that stencil.
So, yeah, I cleaned the glass, let it dry, and I started all over, this time being very careful. But I still didn’t let the size set up long enough – or – I didn’t apply two coats. I’m not sure which.
But you know what?
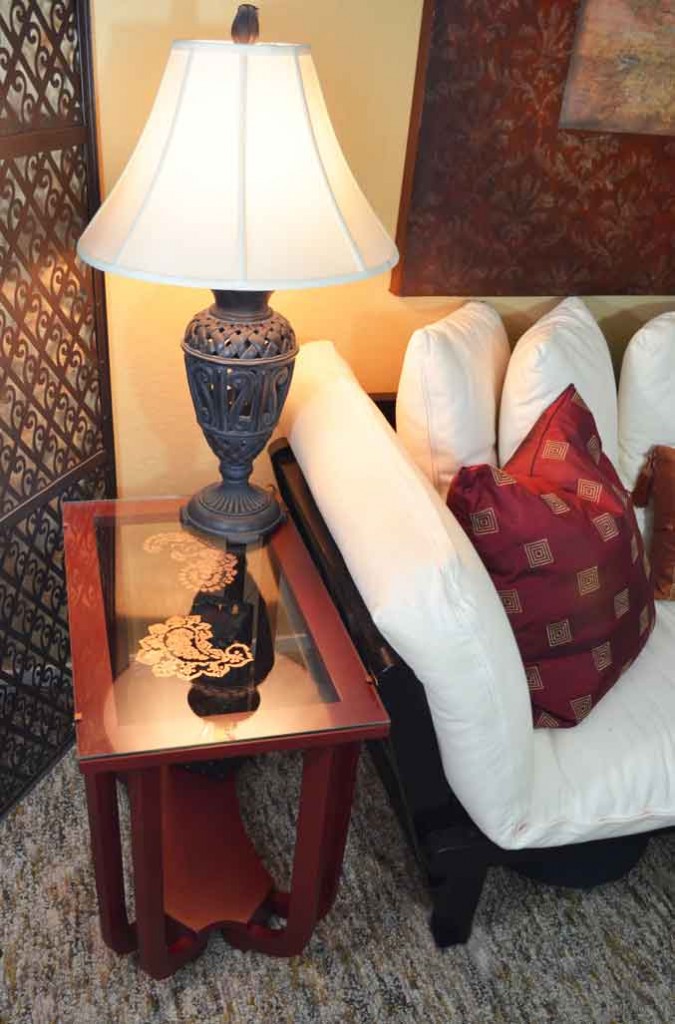
Even with all of my missteps, I love the result.
LOVE!
Sure, it didn’t turn out as precisely as the actual stencil.
But it’s incredibly lovely. The copper leafing has a sheen and texture like no paint I’ve ever seen. It’s rich and dimensional.
When the light hits, it has a warm luminous glow that is stunning.
Sure, a tiny piece is missing here and there but you’d need a magnifying glass to notice.
The red of the table base combined with the copper leaf complements Mom’s decor perfectly.
It’s her new favorite piece now. The fact that it was my brother’s only enhances our love for it.
I had a few problems with the stencil size but the table turned out beautifully.
It’s true that I’m not particularly good at a lot of things, and I am pretty good at a few. Maybe even talented.
But with that talent came hours and hours and hours of practice. Countless hours.
I forgot that part.
Because now it’s only joy when I paint or draw.
But you know what? Trying something new is good – like stenciling copper leaf – even if it doesn’t turn out perfectly. Especially if it doesn’t turn out perfectly. It’s a reminder of what I am good at and how long it took me to accomplish that skill.
And that, my friends, is a good thing to remember.
I’ll be stenciling more copper leafing, believe me. I mean, if I can get this kind of a result the first time? Imagine what might happen with a little bit of practice.
I am deeply grateful to Royal Design Studio for letting me try their stencil size, copper leaf and paisley stencil. If you haven’t already, make sure you check out the entire collection of Royal Design Studio Stencils.
For even more inspiration follow Royal Design Studio on Facebook, Twitter, Pinterest, and Google+. They have wonderful instructional videos on YouTube too. And don’t miss their new online design magazine, Paint + Pattern. I subscribe to it and can’t wait to get a daily dose of inspiration each morning!
Colleen
Disclaimer: Royal Design Studio furnished the supplies for this project. They did not tell me what to paint or what to say. All opinions and ideas, as always, are my own.








What a beautiful table makeover! The Paisley design is such a classic look.
You know I just love your blog, your philosophy and of course your projects. I just wish some of the supplies were not so expensive. I think you and I are about the same age, both still in love with the journey of life. I just don’t have the expendable funds I used to have. I have been coveting this paisley stencil for forever. Any ideas on how I could create something a little less expensive. Keep up the good work.
I totally understand about the expendable funds, Linda, believe me. I am so fortunate to have these opportunities once in a while. Royal Dthesign frequently has sales of 20% or better, which bring down their prices a bit. There is another paisley stencil that is smaller, but still pretty: http://www.royaldesignstudio.com/products/small-rani-paisley-motif-indian-furniture-stencil.
You might also check the craft stores, particularly Michael’s with their 40% coupon. But yes, stencils are pricey. The ones I have are primarily from blogging campaigns. Otherwise I think I’ve bought 2 or 3 because of the expense. I now have a Silhouette cutter but I haven’t used it for stencils, even though that was my main intention with it. Just too many things going on right now.
I hope this helps a bit. Thanks so much for visiting and your kind comments. xo -C
Hi Linda! I wanted to let you know that I just posted a Giveaway for a free stencil from Royal Design! Just go to my Home page and you’ll see it under Latest Post.
Good luck!
xo – C
the table looks stunning. You did a fab job Love the color combination, one enhances the other
What a wonderful makeover, Colleen! The red and the copper leaf are eyecatching and go with your mom’s decor perfectly. How nice it was your brother’s, too. I so enjoy reading and learning from both your trials AND triumphs. Thanks for keeping it real!
I’m just loving this little table as much as you I think. First of all, wow! what a difference a coat of paint made on that table. It really took on an oriental feel with the red, plus a much more expensive looking item now. I love the oriental theme by the way. Your mother’s space is beautiful. I love the copper and the way it shines, I think you did a great job. I too love that you keep it real
Aw, thanks Jaime! The red surprised me too. I originally thought about spraying a high gloss lacquer over it – and I might still do that. I’m thinking about adding another copper leaf paisley to the little shelf. But I still need to practice. It wouldn’t be as easy to remove from the wood as it was from the glass. But if I do another stencil, then I’ll definitely lacquer the whole thing.
Thanks again. Hope you had a great Mother’s Day! xo