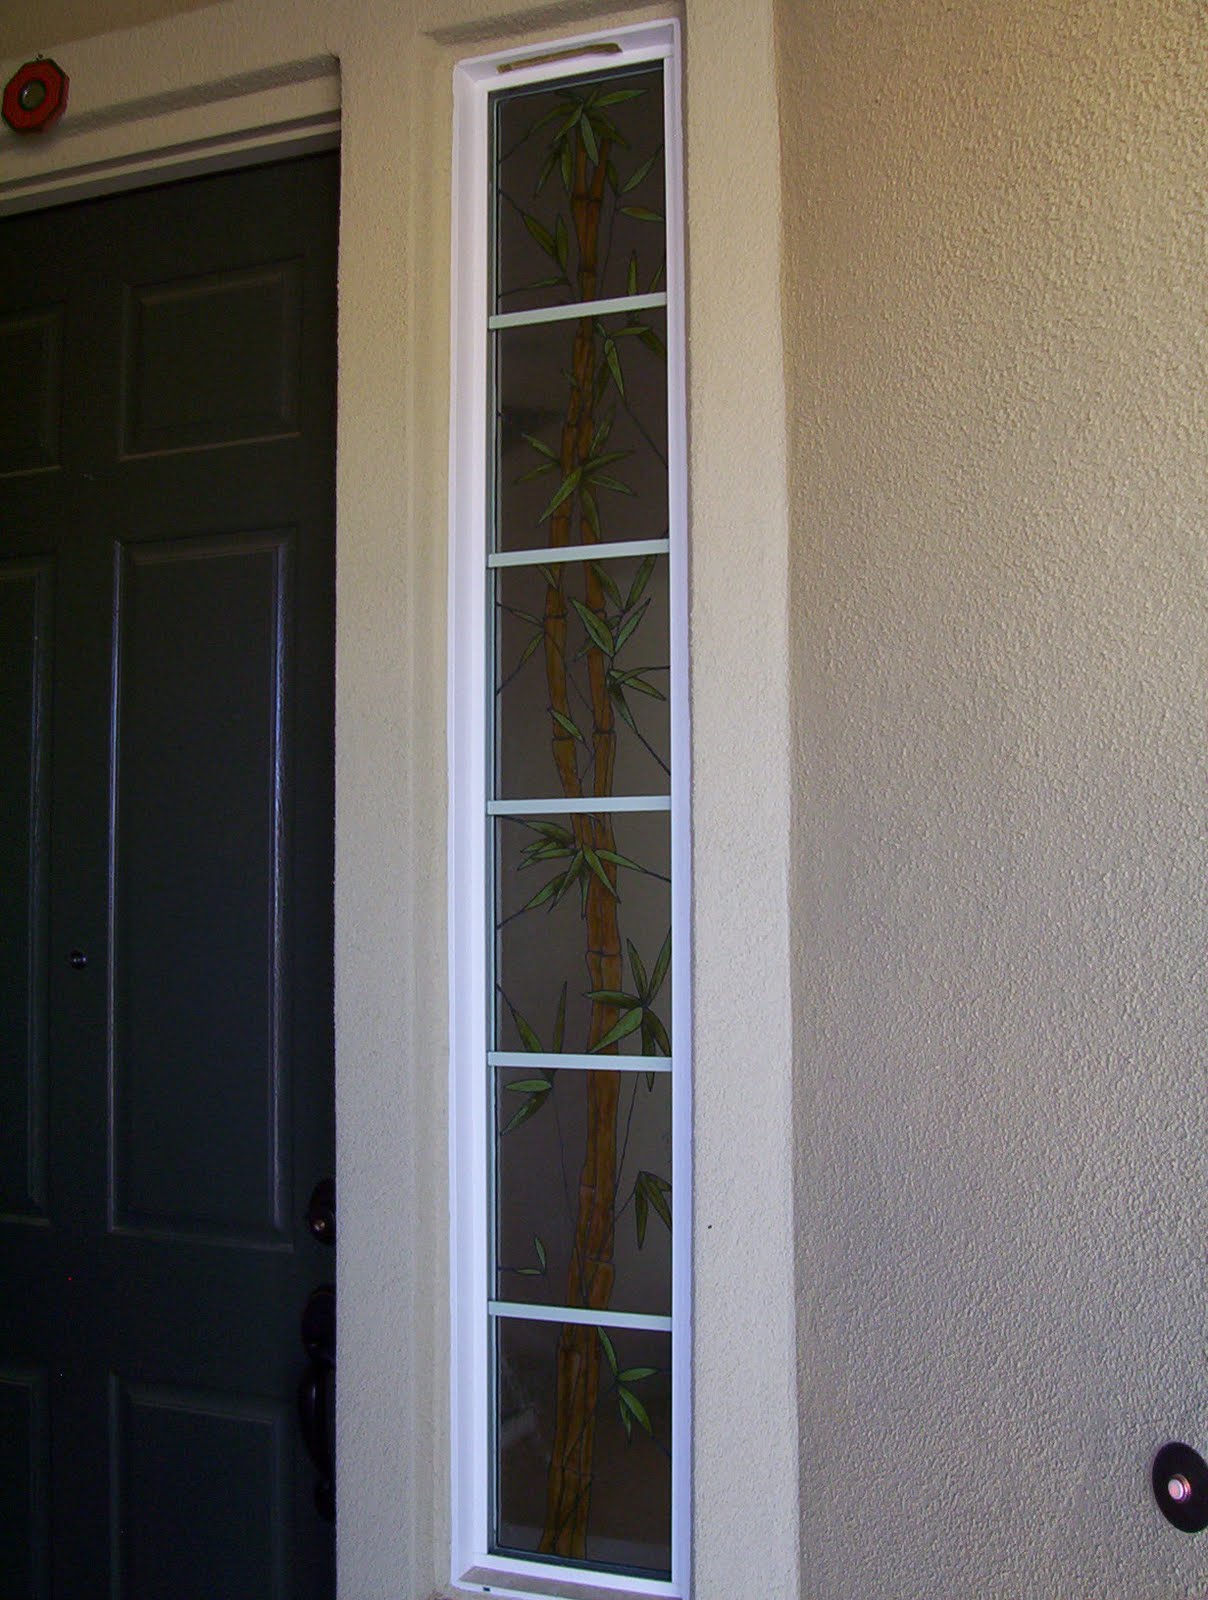
 This project was such fun! I used Plaid’s Gallery Glass. It’s a great product line to use on any glass – windows, mirrors, glass tabletops and even lampshades.Light still filters in, but you get decoration & privacy, which is what my mother wanted in her side light.
Here’s what it looked like before – just a plain ol’ window.
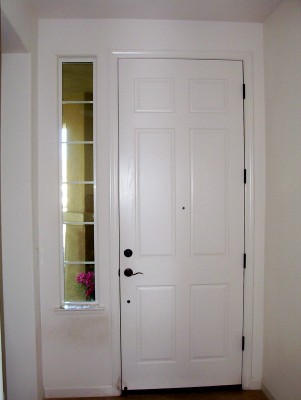
We thought about blinds or a drape, but the cost for a custom-made anything was too much. I even tried hanging a scarf with knobs above the window. It looked okay but was too ‘much’, you know?
Now I will admit that Gallery Glass takes some practice, but it’s sooo worth it! One thing you’ll want to do before you start is study some stained glass – how it connects, how many pieces of glass they use, etc. You want to make yours have ‘leading’ just like real stained glass so it really looks authentic.
You’ll need the following Gallery Glass products:
- Liquid Leading
- Mylar Leading Blanks
- Leading Strips
- assorted Window Color(s)
- Crystal Clear, if desired, to fill in blank spaces
- Treasure Silver
Other helpful supplies include an craft knife, cotton swabs, and plastic toothpicks. I use the toothpicks to smooth the liquid color out while it’s still wet.
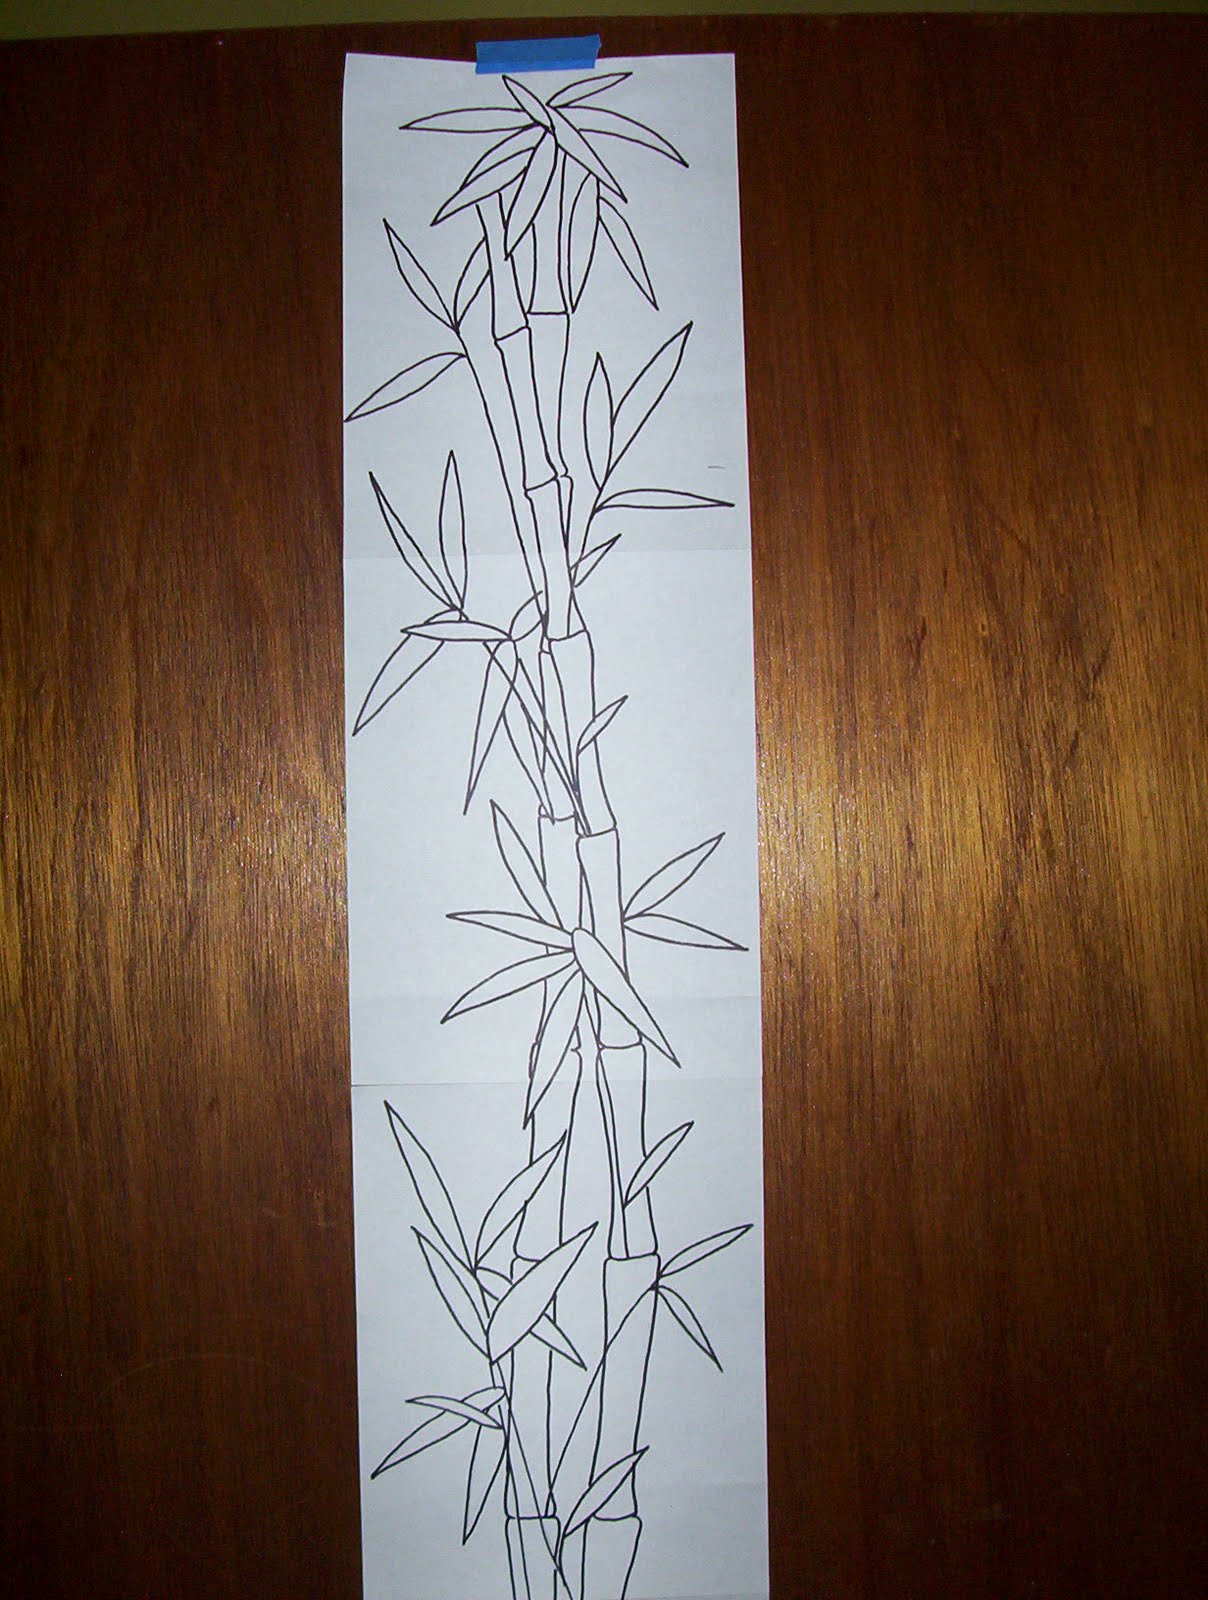
The first thing, however, is to get an inspiration picture. I googled stain glass images to get ideas of actual stained glass. It’s helpful to see how artisans cut their glass. It’ll help you to add more realism to your project.
If you can’t find an image you like, or need help designing one, email me. I’ll be glad to help with the line art pattern.
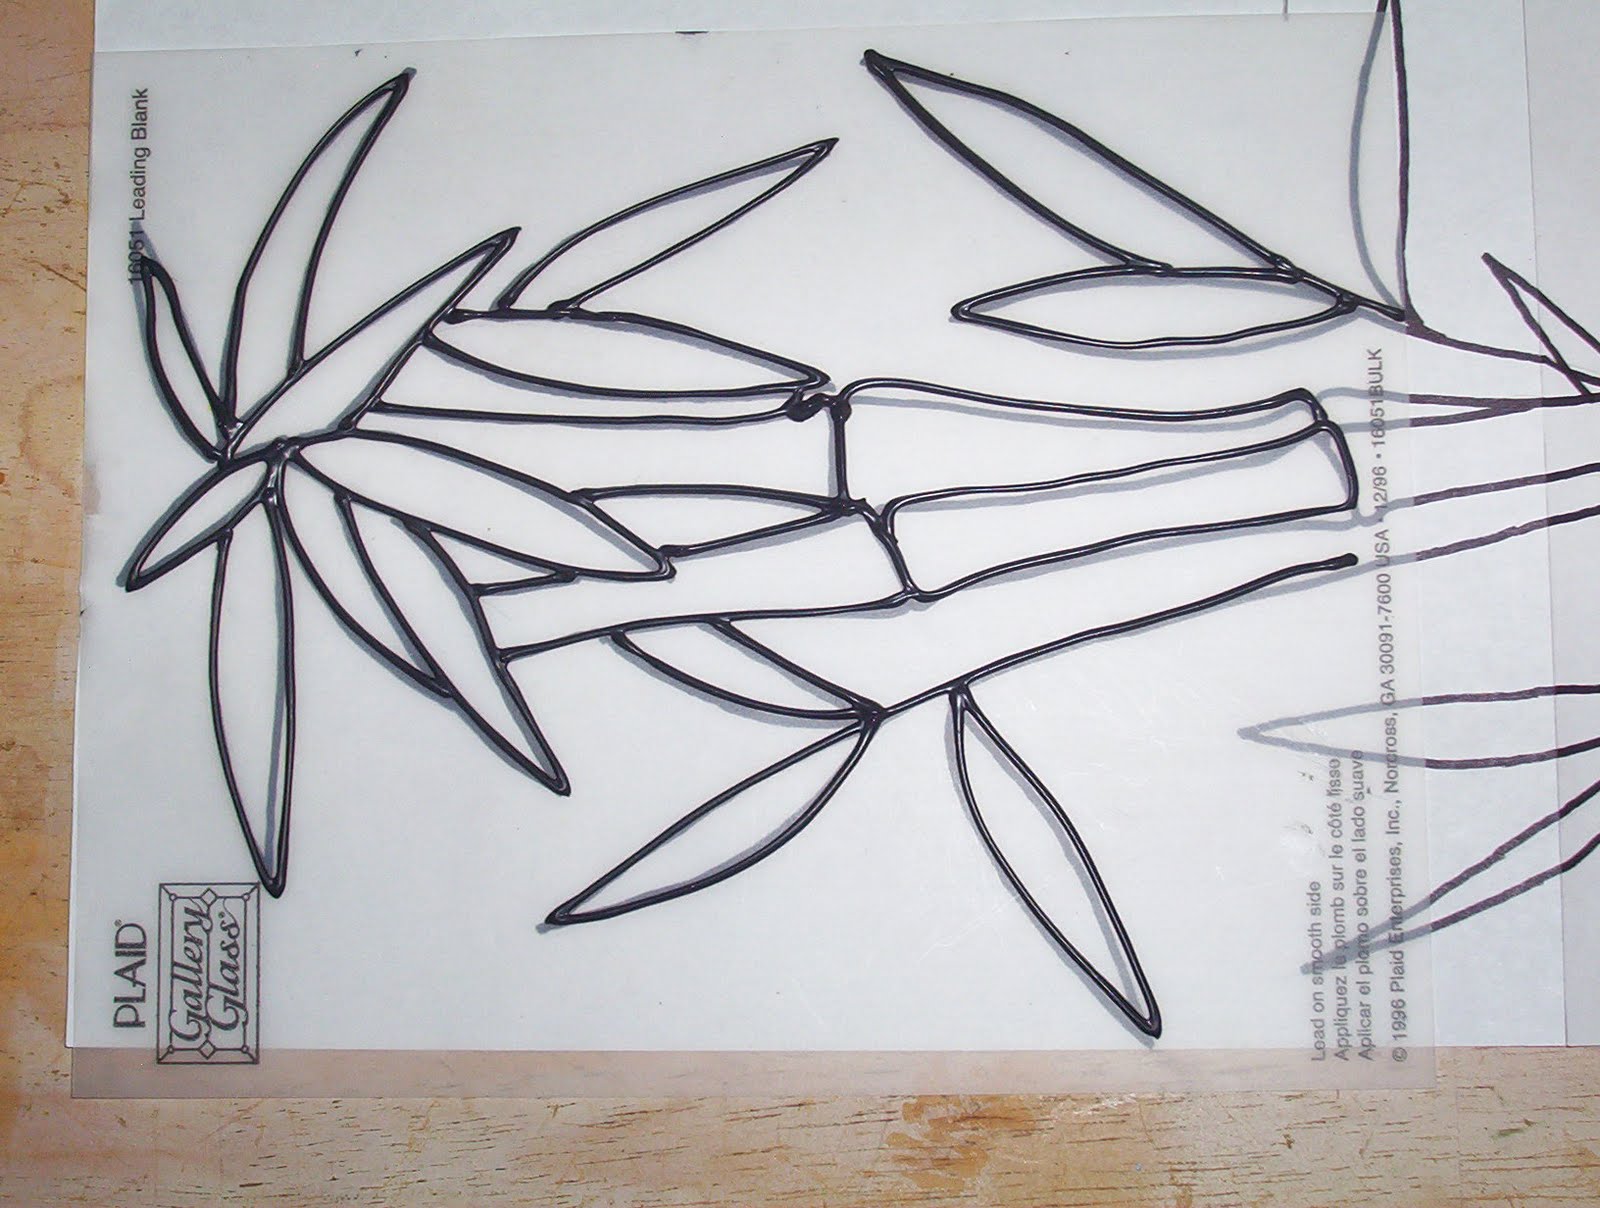
Next, you place the mylar blank over the pattern and pour the ‘leading’. If you’ve ever done cake decorating, it’s a lot like that. It takes a little practice, but it’s really easy once you get the hang of it.
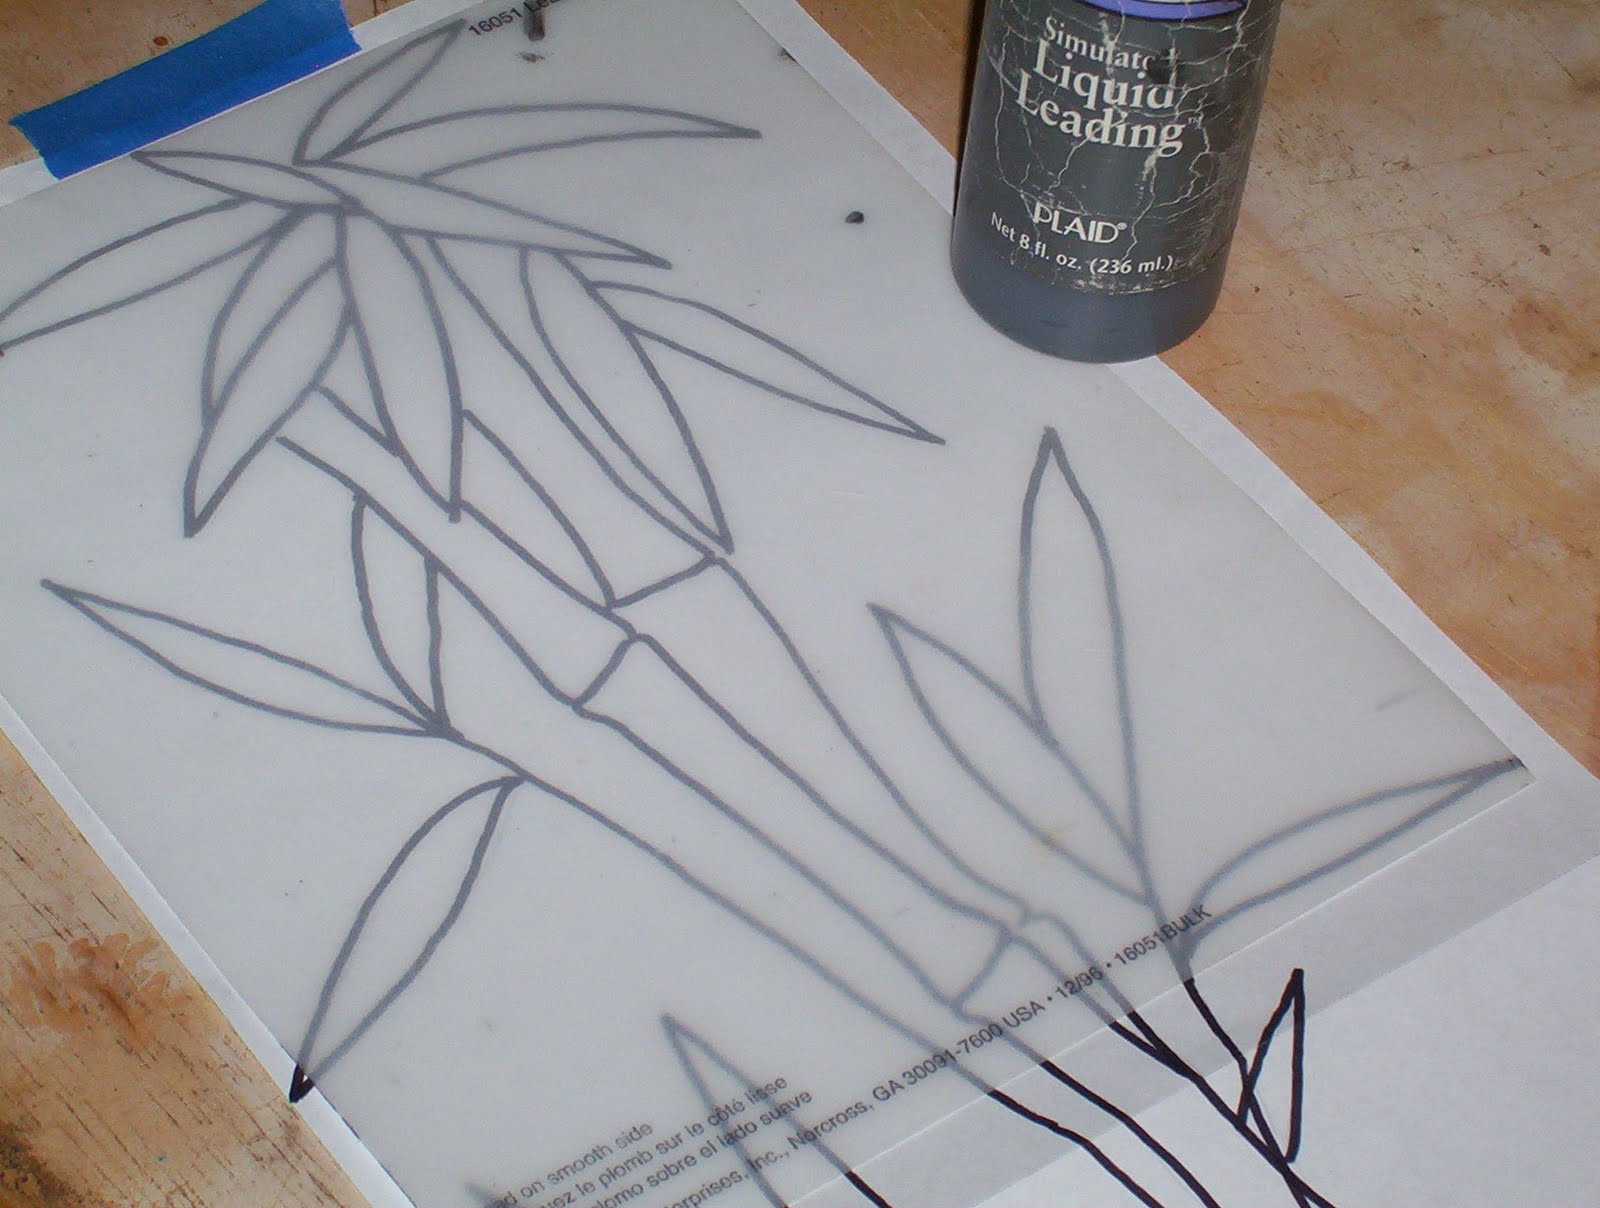
After you’ve poured the entire design, set it aside and allow it to dry – approximately 8 hours, depending upon the weather.
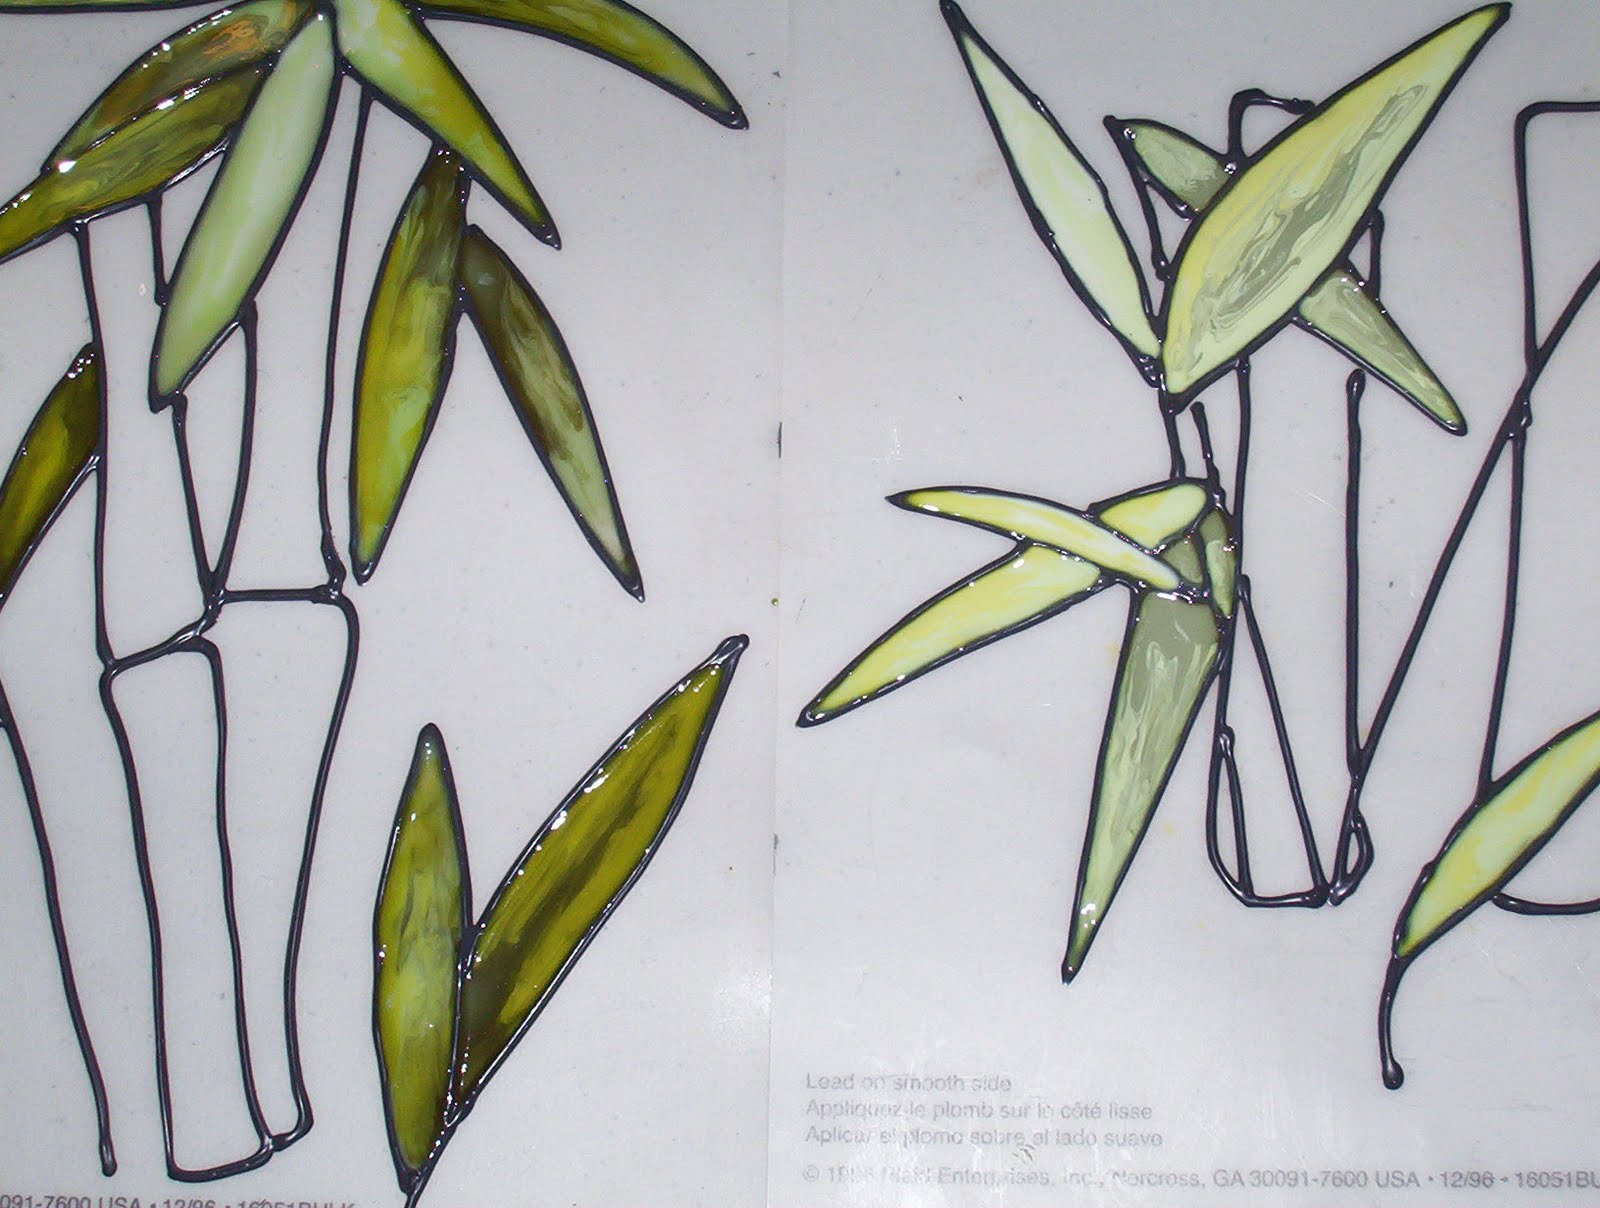
Then ‘pour’ the color. I like to mix my colors – 2 or 3 greens, etc. It pours out cloudy, but dries translucent. This also takes a few hours to dry.
It’s fun to see it come to life as it dries, but this project does take a couple of days, just because of the drying time involved.
Plus, you’ll need some flat areas to store the mylar sheets. Particularly if you have little ones roaming around the house!
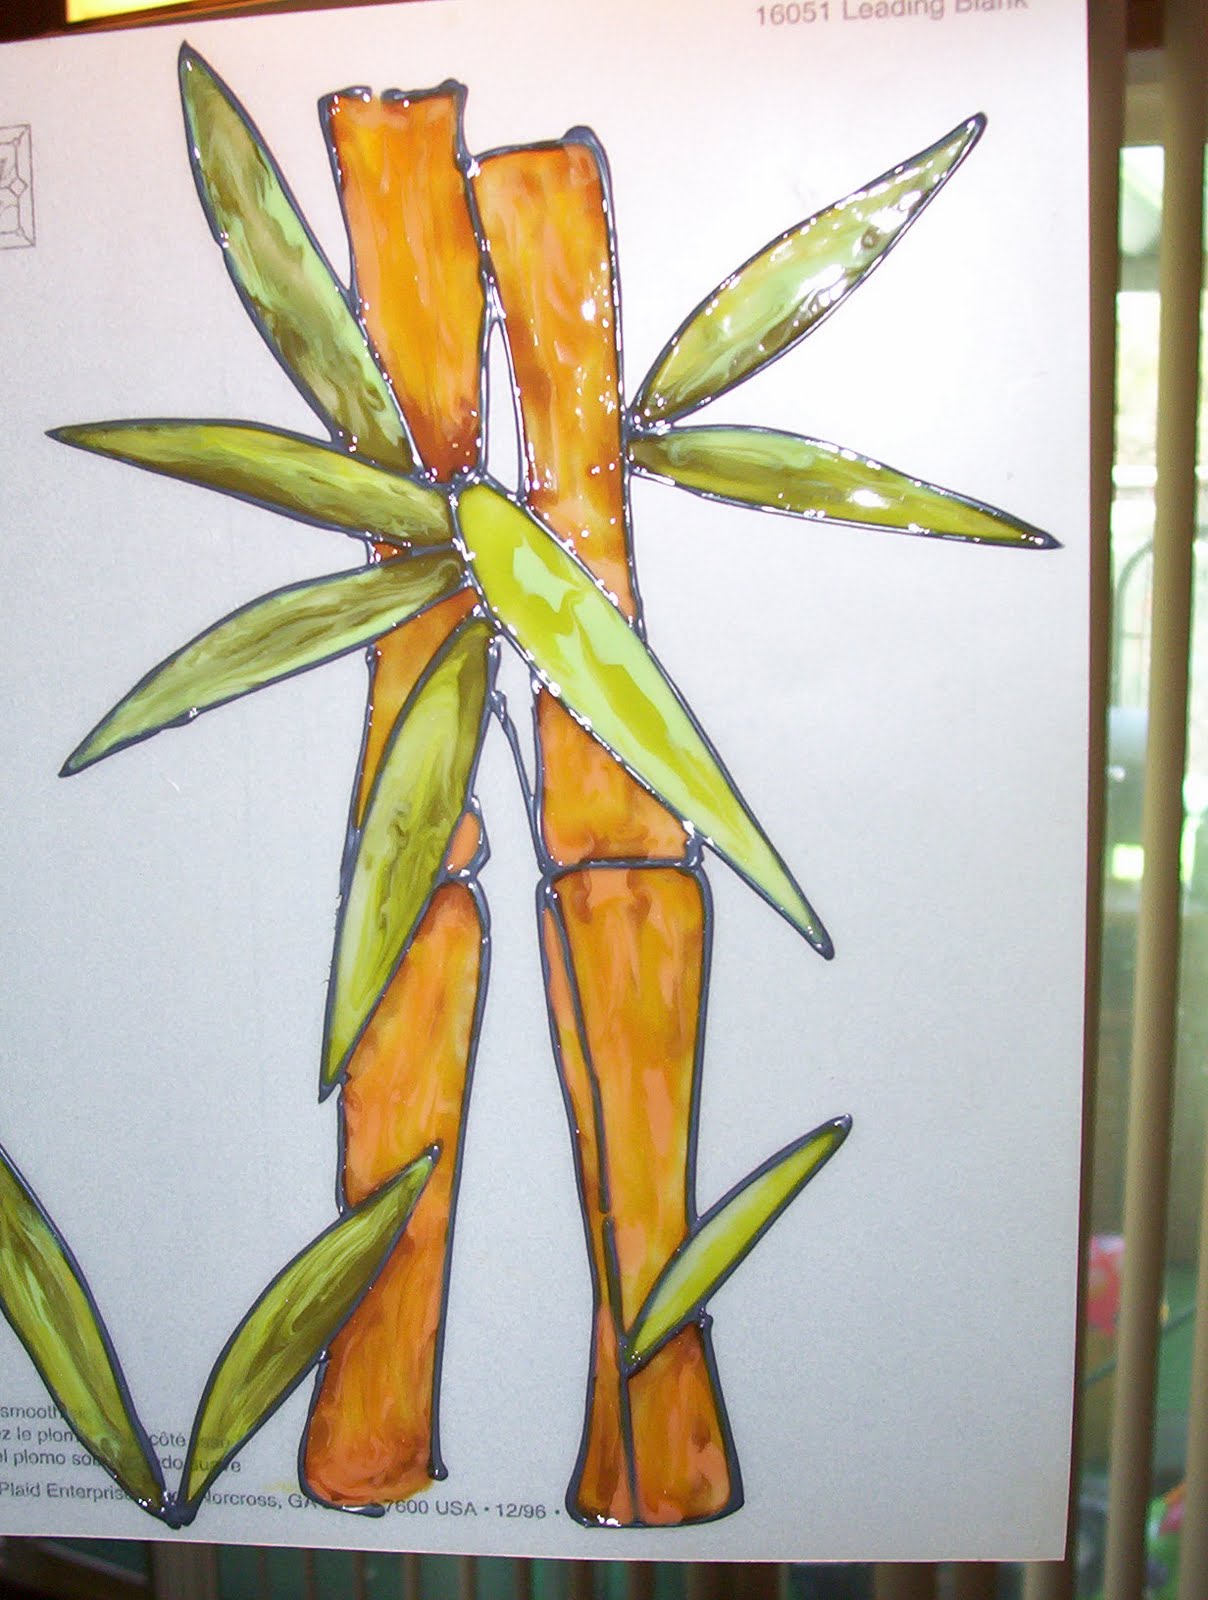
I poured two colors for the bamboo stalks as well.
Once you pour the color, take a toothpick to spread it out and make sure it fills in completely. Otherwise it’ll tear when you remove it from the mylar.
Another tip, take a nut pick (it comes w/Gallery Glass kits) and tap the under side of the mylar to remove any bubbles.
It’s like when you ‘burp’ an unbaked cake to remove air bubbles. You might not get all of them out, but some bubbles add to the realism.

Once your pattern is fully dry, peel it off the mylar and position it on to your window.
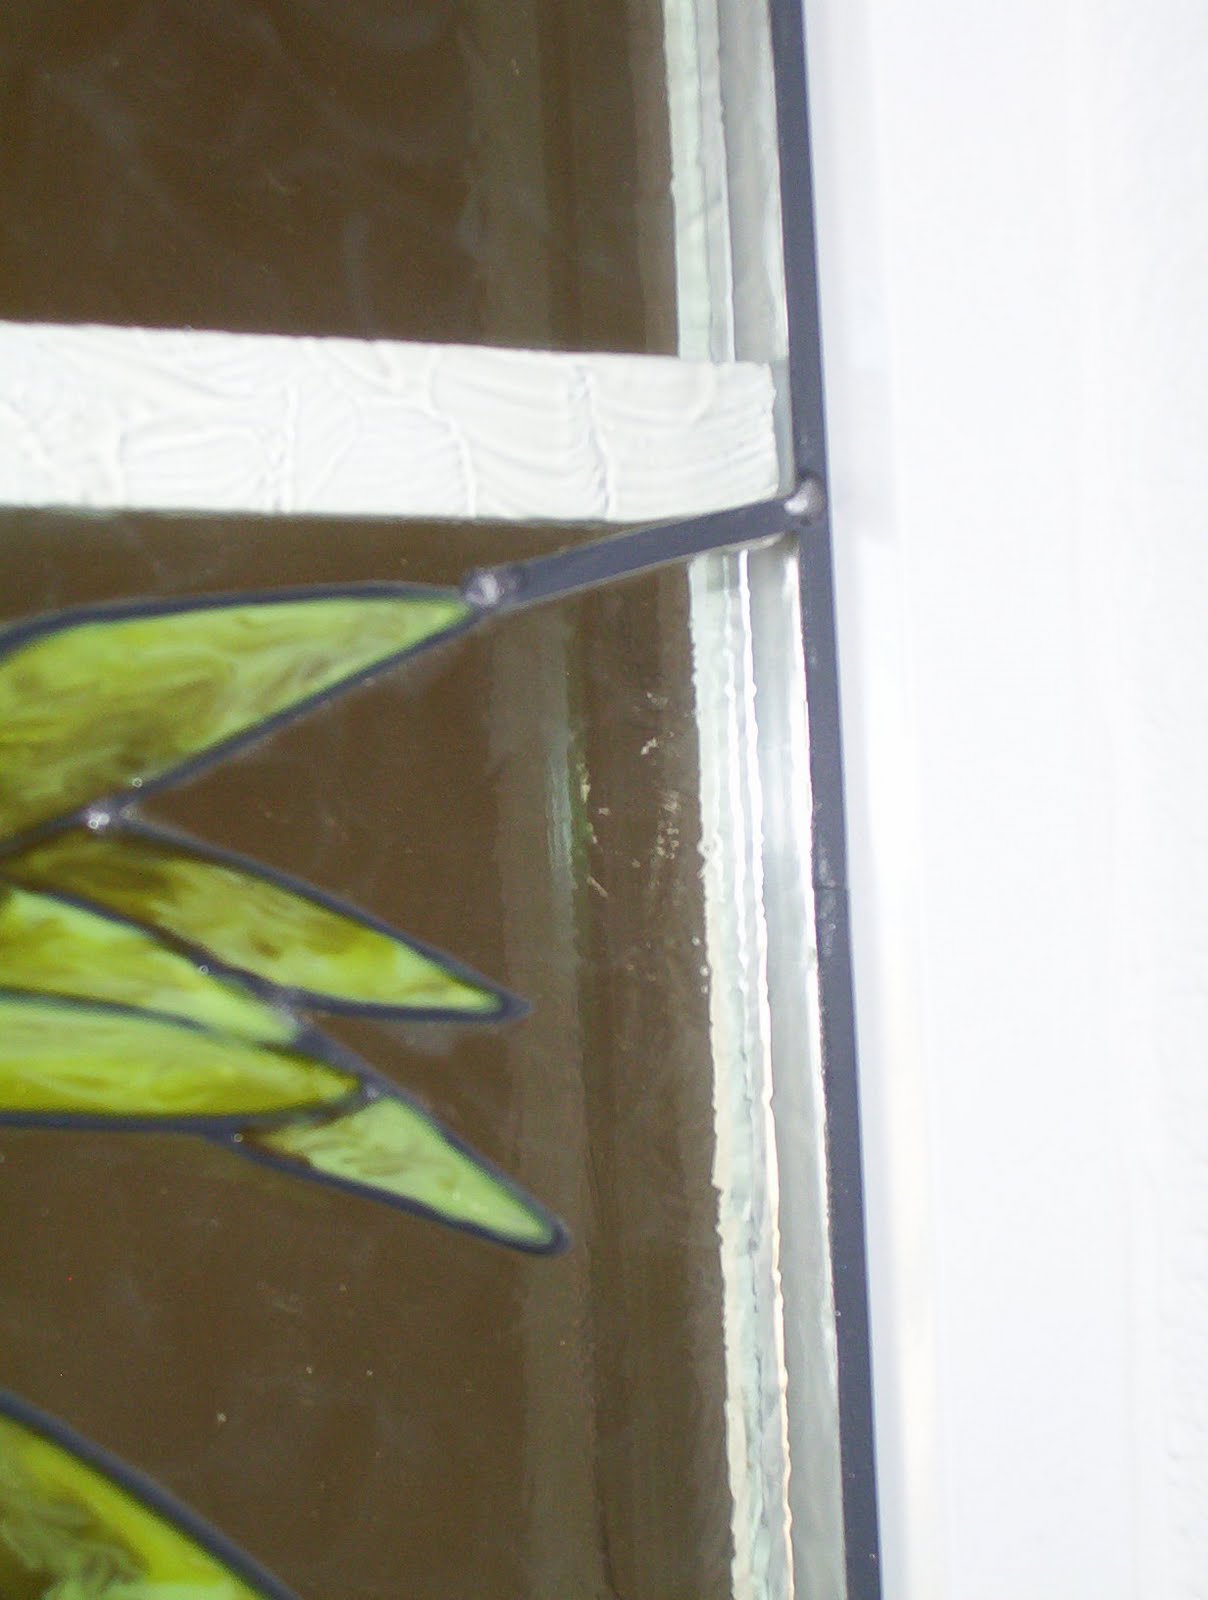
Then I apply leading strips all around the perimeter of the window. You can buy these separately or just pour your own.
The connect the pattern pieces to the perimeter leading to create the illusion of glass pieces. Again, you can use pre-poured leading strips.
Once you have all your leading in place, take your liquid leading and ‘dot’ the connections. It’ll look like little soldering joints.
When those dry, take a cotton swab & add a little Treasure Silver to the joints. This gives it dimension and really looks like actual soldering.
Finally, I filled the entire window in with Crystal Clear, just dabbing with an old paintbrush. You could use color, if you want.
That’s it! Beautiful faux stained glass!
It looks almost as good from the reverse side as it does the front.
You can see the full picture tutorial here.
Do you have a window or mirror that needs some sprucing up this spring? Try Gallery Glass. It’s fun, easy, and fully removable – so if you’re in an apartment or rental, it is perfect. Plus, it’s much, much cheaper than actual stained glass. You can clean it with a damp cloth and it’ll last until you decide to take it down.
Who said murals had to be only painted?
What a great post — the end result is beautiful, Colleen! I’ll have to look into this…
Beautiful!
You’re berry, berry talented!!! But, I already knew that. ((:^>
Love the new blog. I’m bookmarking it and will be back often.
I’m a fan of Gallery Glass, Colleen! It blends beautifully, but you never really know how it looks until it dries and always dries better than you think! ha!
Love the sidelites, beautiful pattern! Great tutorial! Thanks!
Cheers!
Tina
Very pretty!
Thanks for joining Get Your Craft on Thursday. Please join me next week for another wonderful party!!
Please stop by next week I am having guest over each day and I would love for you to tell them HI!
Fantastic,love it, you did a great job, the pattern iws beautiful , your idea is marvellous…
Please check. I have something new
http://craftaworld.blogspot.com
Thanks a ton it is a very good help, now to make an easy winmural is definitely very easy by using your recommendation. Thanks
Hi Colleen, beautiful job!!!
GG is kind of hard to find now in CA, but I did find some in the garage, from when it first came out. I bought allot of it when Carol from Plaid was on CVN/QVC
I have 3 huge windows and did them all with birds, butterflies–oh my LOL
I just took it off a couple of months ago, so U can imagine how long I had it been up there I did it the hard way-taped the pattern to the outside of the window and used the leading etc. from the inside!
U have inspired me to do a new design, thank U!! But this time I’m trying it Ur way, with mylar.
Thanks again for the inspiration, Pam
Hi Pam! I haven’t been to Michael’s in a while but last time I was there Martha’s glass line was taking up half an aisle. I can’t believe you did a window with everything directly on the window! Oh, you’ll love doing designs on mylar and then just sticking it up where you want! Let me know how it turns out!