
Hi there! Welcome to Day 3 of The Craft Room Tour, hosted by Angie of The Country Chic Cottage. I’m starting today’s tour, but make sure you don’t miss any of the fabulous rooms from Day 1 and Day 2
Let me start by saying that there’s not a single day that goes by that I don’t look around this space with total appreciation. But then, it was a long time coming and I spent many years painting, and crafting, on a small table in my bedroom. It’s because of those countless hours in a cramped corner that I enjoy my studio even more, believe me!
Also, because I share a house with my mother that is “dual-living” with her space upstairs and mine downstairs, I can devote the main room in my level as my work space. Since I spend anywhere from 10 – 12 hours here a day, I want it to not only be functional, but cute as well. The “cute” part is coming along, but it’s set up almost perfectly for everything my work requires, which makes my work even more fun!
Let me show you around . . .

Once downstairs my main workroom is on the right with my desk, worktable, storage cabinets and a dresser that doubles for photo shoots.

I just recently painted this desk my dad built about 60 years ago for my brothers. It was my first time using Chalk Paint and it really helped the room’s cute factor.

Next to my desk is an old (but necessary) file cabinet I spraypainted with RustOleum’s Aqua. I want to paint something decorative on it too but I’m not sure what yet so I’ll settle for a fresh coat of paint for now.

Above the file cabinet hang some upcycled thrift store frames I write on with dry-erase markers for project updates. A little paint and some scrapbook paper makes an old frame much prettier than a simple white board.
Have you noticed that I’m partial to turquoise?
Just a bit.

The star of the room is my worktable, which is just two bookcases with an old door laid across the top. That gives me a 30″ x 80″ workspace that is waist-high.
I think everyone needs one of these, whether they’re an artist, a crafter, or whatever. Everyone needs this much space in their life. You can either lay out one huge project or have 4 or 5 going at once. Which is my usual mode.
Not to mention it really doesn’t cost that much. I got the bookcases at Walmart for around $16 or so and the door was from Habitat Restore for $10.
The best $42 I ever spent in my life, I believe.

I wrapped the edges of the door in polka dot Duck Tape which has stayed on for over 6 months with no issues.
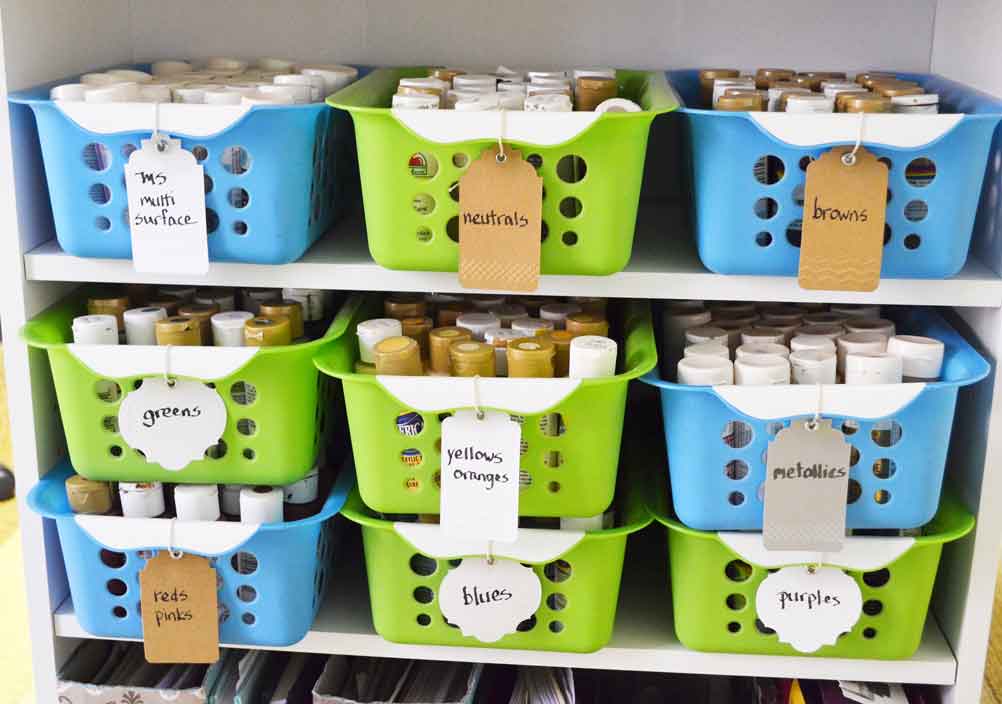
One bookcase holds my craft paints in plastic bins from the dollar store.

The other side holds pens, pencils, and specialty paints.

The great thing about a table that’s waist high and 80″ long is there’s an abundance of space underneath the table! I have two stools, my recycling bin, waste basket, and a plastic cart from the thrift store.

This l’il guy was $8, I think. And worth every cent. I love having everything within arm’s reach while I’m working.
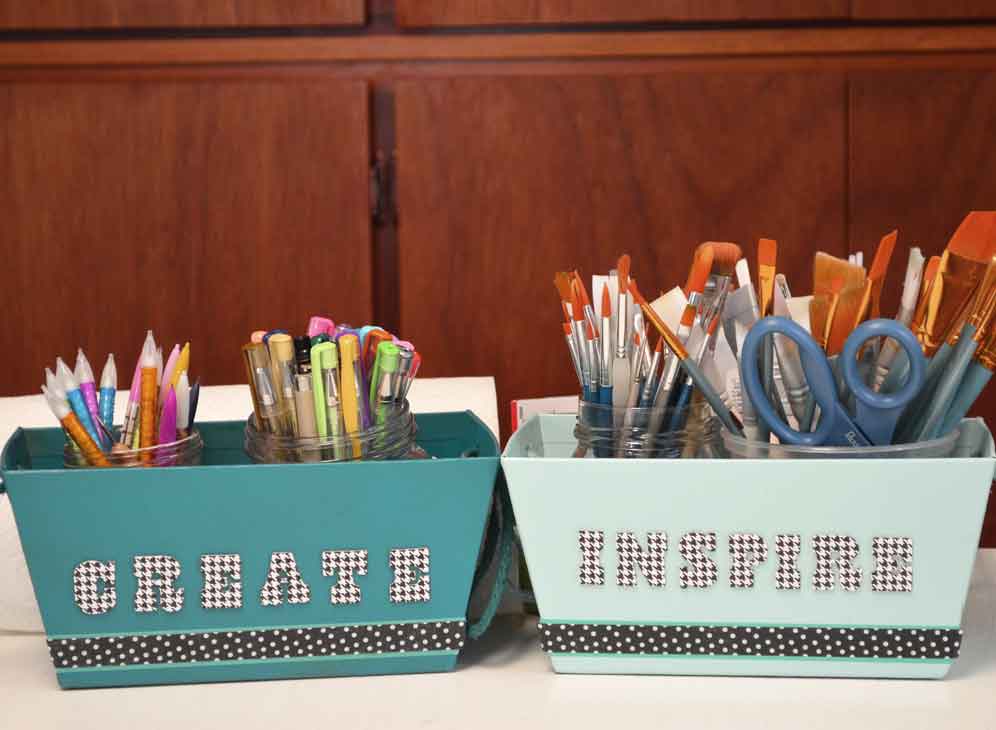
These tubs from Target house my ‘everyday’ paintbrushes, pencils and pens. If I’m painting on one end of the worktable, I grab that tub and if I’m doodling on the other end, I grab that tub for down there. Works great to keep everything together, yet I can carry my supplies when and where I need them too.
Now, let’s talk about storage. I have an abundance of it. And yes, I do know how fortunate I am.

Having floor to ceiling cabinets is every creative person’s dream, I think.
I haven’t labeled the shelves yet because I am still moving things around to see what makes sense. Right now, the left section holds most of my craft supplies – scrapbook papers, punches, beads, and stuff I don’t use very often.
The middle section is home to my Silhouette cutter now. It was on my desk but I like seeing the pretty turquoise swirls for right now. Above the cutter are two shelves just for canvas and paper projects that are in-progress. I always have a ton of projects going, in various stages, and I need lots of room to store them. The lower shelves hold my spray paints, primers, sealers and other specialty paints.
The right upper section is for paintables – things that need to be painted. Of course, after a trip to the thrift store, paintables will wind up wherever there’s an empty spot. In the lower section I keep some plastic bins for paint projects I’m working on. That way I always have the colors in one bin for each particular painting or project. There are also more paintables along with wax and freezer papers and adhesives, stuff I use pretty often.

On the other side of the worktable is an old dresser that holds all sorts of things like fabric, floral arranging tools, and photography stuff. It’s just waiting for a fresh coat of Chalk Paint.
I hung a cheap roller shade above the dresser for a photography backdrop. I never even roll it up, I use it so often.
If there’s one downside to my work area, however, it’s the lack of light. All of the windows face North, which gives a greyish cast to everything. I sacrificed good lighting because the rest of the space was so great though.

This is the other part of the room, to the left of the stairs. Just so you can see how dark it is. And also to see that, yeah, it’s pretty much a mess most of the time because it’s where I stash stuff I haven’t put away yet.
I bought some white wallpaper to hang behind the bookshelves to help reflect what little light I get from the windows. And I do like to stage the bookcases with little pretties for each season and holiday. However, right now it’s a combination of Spring, Christmas, and my brother’s stuff.
Nice.

I recently bought these umbrella lights from Amazon to help with taking photos. They are awesome. I love that they come on a telescoping tripod that I can lower or raise as I need for various shots.

Can you tell the difference? Believe me, I don’t know what I did without them. Well worth the investment of around $60.
Oh, the silver thing is a floor screen I’m in the middle of painting that I got at the thrift store for $10. I’ve always loved floor screens but this one actually serves a purpose.
 It camouflages more of my stuff. Like this other light that comes with the umbrella lights. (I don’t know why this one doesn’t have an umbrella.) The basket holds my rolled canvases along with a few camera tripods.
Just stuff. Necessary, but . . . stuff.
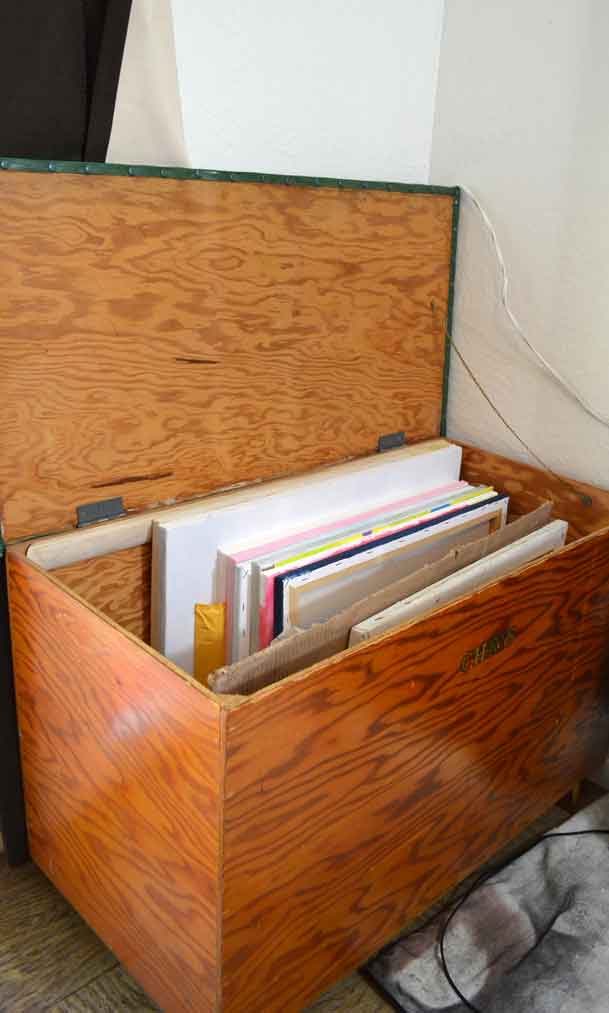
Hidden by the left side of the screen is my brother’s old toy chest that houses my stretched canvases.
It’s funny. I’ve held onto this toy chest for years for no particular reason. I kept thinking I’d paint it one day for my grandson – and I will – but now it has sentimental value since we recently lost my brother.
I’m so glad I did hold onto it.
So that completes the tour of my craft room. Like I said, not a day goes by that I don’t walk in here and count my blessings. I hope you got some ideas for your own creative space.
And now I’m going to point you in the direction of the next room on the tour at Condo Blues.

Don’t forget to check out The Country Chic Cottage and her fabulous craft room too! Plus, she has the listing for the entire craft room tour.
Thanks so much for dropping by today!
Colleen
Love your space! I wanted to tell you that the extra light that came in your set is a back light. When you set up a portrait of someone and you want some separation between your subject and the background, you put that behind them. Maybe you will be able to use it one day!
How interesting! Yes, I might be able to use it . . . for more than an ‘extra’ light, haha. Thanks so much!
I love your organization! I,m also blessed with lots of work space and I have to keep it neat or I’m unproductive. The painted desk is gorgeous!
My only suggestion is to remove the label on the garbage can! It’s a pet peeve of mine!
God bless!
Katherine
Colleen I love your space, especially the desk!
I don’t mind the label on the trash can. It proves it is an artist’s work space
I am so happy for you that you finally have such a wonderful space to work in! You have certainly been through more than your share to get there, and I feel no one deserves this more than you. I was excited to see the photos of your room, you have done such a great job not only organizing, but also decorating. I am moving (AGAIN) and plan to use some of your ideas when I get into my new space.
Enjoy and may you have many happy and creative years there,
Maureen
I LOVE that painted desk! And the turquoise. I just used a bit of it in my own craft room makeover. I am envious of that work table, too–that’s about that last thing on my craft room wish list, except for it to be a little bigger!
I love this space Colleen!! Totally jealous of those cabinets!!
Definitely the deal-maker for this house. Thanks for hosting. Great week!
Fantastic studio! I love how you have everything separated but together all in the same room! You did a great job painting that desk with the blue flourishes, i love it! I just wish I had that type of cabinet space to put all my stuff in too! haha!
Love the white desk with the swirls. What a wonderful place to craft. I have a closet in my room that has stuff stored in just about every inch and it is nice to close the doors when I am done crafting.