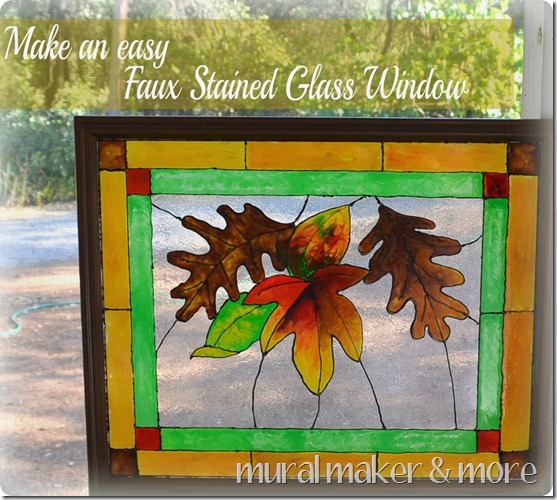
I am so excited to share this project with you! A few weeks ago I received an incredible box of assorted glass paints from DecoArt. They are scrumptious! You’ll be seeing tons of glass painting projects here soon, believe me. But when I saw Glass Stains, I knew what my first project would be – faux stained glass!
Does it look like it might be hard or complicated? It’s not, my friends. You don’t even have to know how to paint. Really!
I wanted to make something that would reflect the beautiful ambers, golds and russets of Fall. Ahhh . . . aren’t you ready? And truly, what is more lovely than those colors when they’re translucent? When light passes thru them and creates a spectacular dance of shades and hues.
Thanks to DecoArt Glass Stains, it was fun and easy.
Supplies Needed
(affiliate links included)
- Glass surface (I used a thrift store frame)
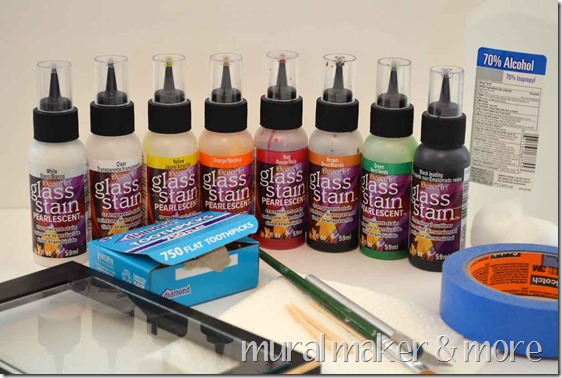
- Rubbing alcohol & cotton to clean the glass
- Pattern (see below)
- Glass Stain Leading
- Utility Knife
- Glass Stains in
- Clear
- Yellow
- Orange
- Red
- Brown
- Green
- Toothpicks
- Paper Towels
- Small Paintbrush
- optional: painter’s tape
You can use anything for your pattern, or my fall leaves, if you’d like. All you need is an outline.
Or you could also use stencils. DecoArt has some wonderful self-adhesive stencils that adhere to the glass. Perfect for curved shapes.
Below I’ve written the steps out but here’s a video too.
Prepare Glass for Glass Stain
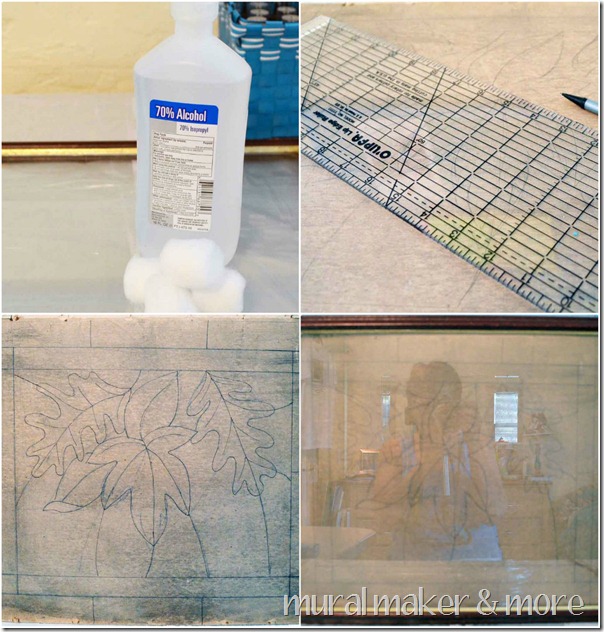
First, thoroughly clean the glass with rubbing alcohol and allow to dry. While it’s drying, mark off the borders. I used the cardboard that came in the frame, created the borders and transferred the leaves.
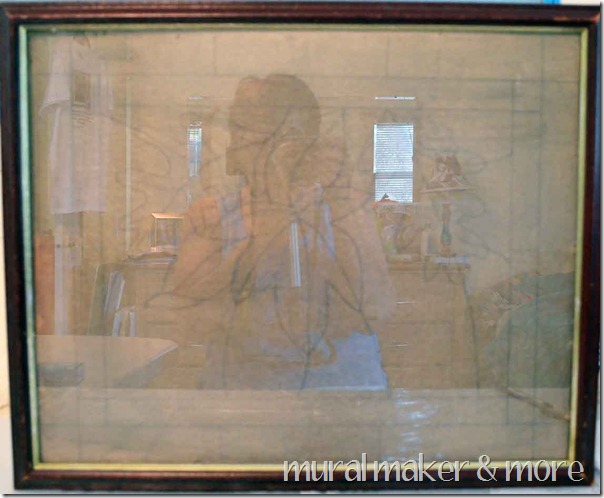
Then I popped the glass and cardboard back into the frame.
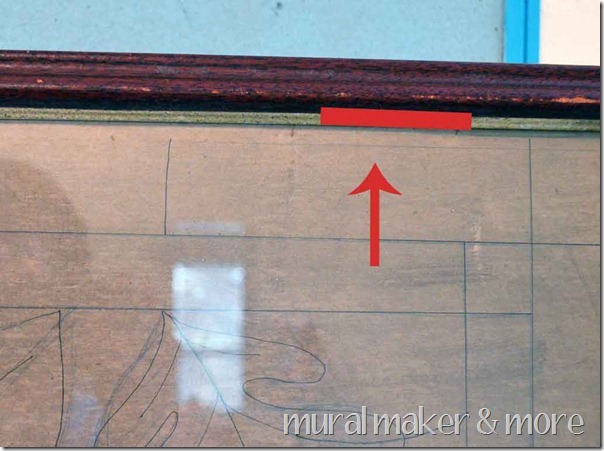
Then I saw a little ‘issue’. My border lines were not matching up to the frame. *scratching head* I basically ditched everything but the leaves.
That’s why my pattern above is only the leaves. You can place the grouping in the middle of your frame and then create borders lines that fit your frame.
Make sense?
How To Pour Glass Stain Leading
Does the thought of painting or drawing a straight line freak you out? If it does, you’ll want to practice pouring your leading lines a few times to get the feel of it before working on your glass.
It’s not hard – but you want to get the feel of how much pressure to apply so that you’re comfortable.
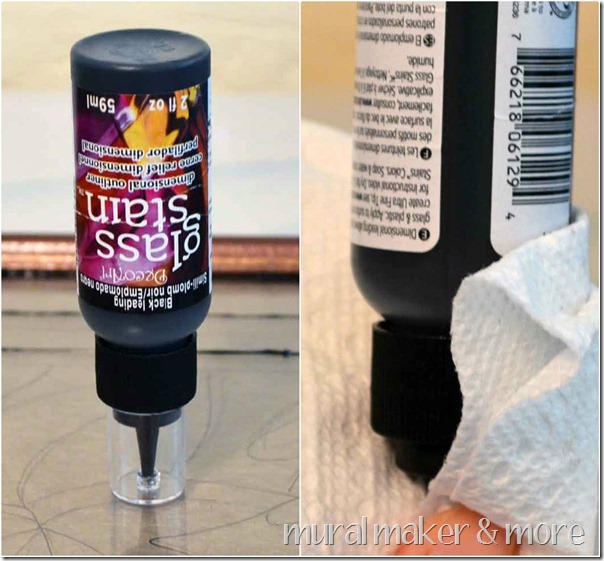
I store the leading upside down so it’s ready to flow, without bubbles or need for excessive pressure. Trust me – I speak from experience.
Keep your paper towel handy to wipe the tip after each pour. You’ll keep the opening free and clear this way and, again, won’t need excessive pressure.
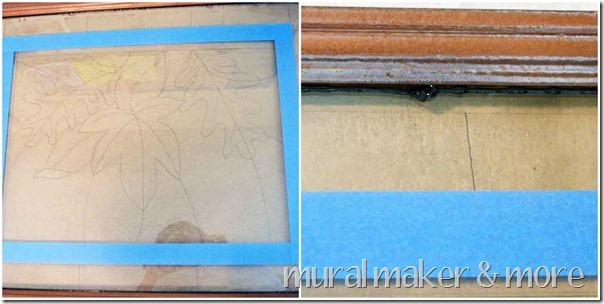
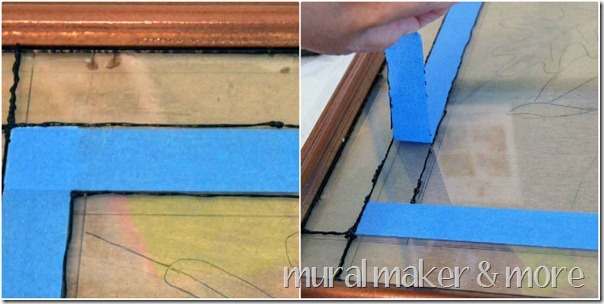
Since the ruled lines I drew didn’t fit the frame, I grabbed some painter’s tape and masked off a square about an inch inside the frame. After the tape is placed, pour leading around the entire inside of the frame.
Think about real stained glass – it’s a bunch of pieces of glass that are soldered together. So you want to create that effect with your leading and “solder” the glass into the frame.
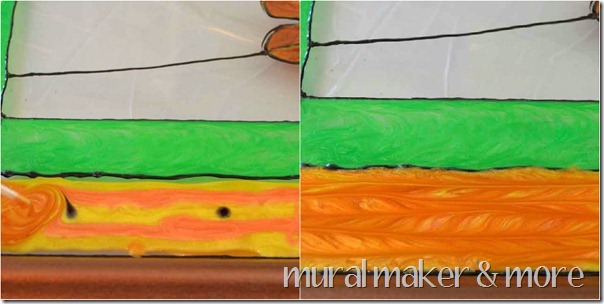
Look at the blue rectangle on the left. Notice that the bottom tape has no leading. That’s because leading takes about 6-8 hours to dry fully and I didn’t want to mess up that bottom line, so I left it ‘til last.
See the pic on the right? Yeah. I had some goopy clumps. No worries, ok? Just allow the leading to completely dry and then remove any clumps with your utility knife.
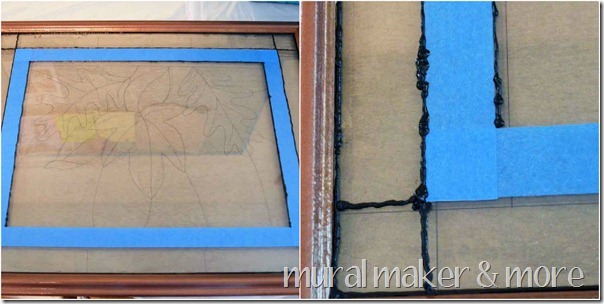
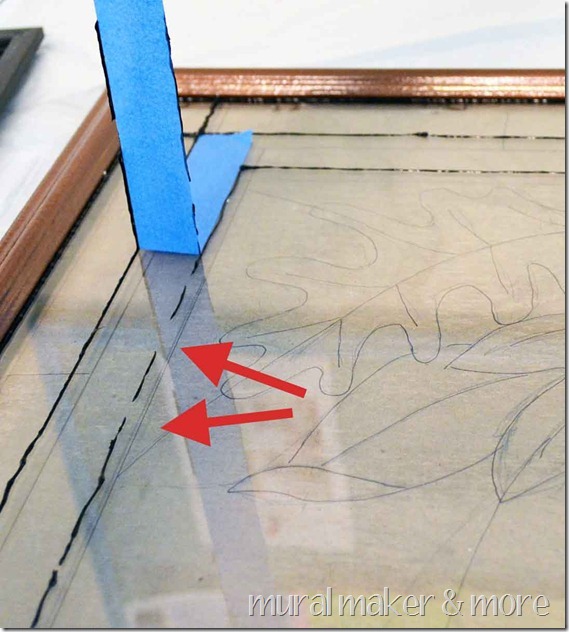
I pulled the tape up while the leading was wet. It might work if you let the leading dry. I dunno. I was too afraid I’d pull up all of the leading so I didn’t wait. It worked really well to create a nice straight line.
Yeah, I missed a spot here and there. Again, no worries. Just come back with your leading and fill it in.
Oh, I want to mention that there’s a cool video on DecoArt that shows you how to make really, really fine lines by just adding some adhesive tape to the tip of the bottle. Check it out.
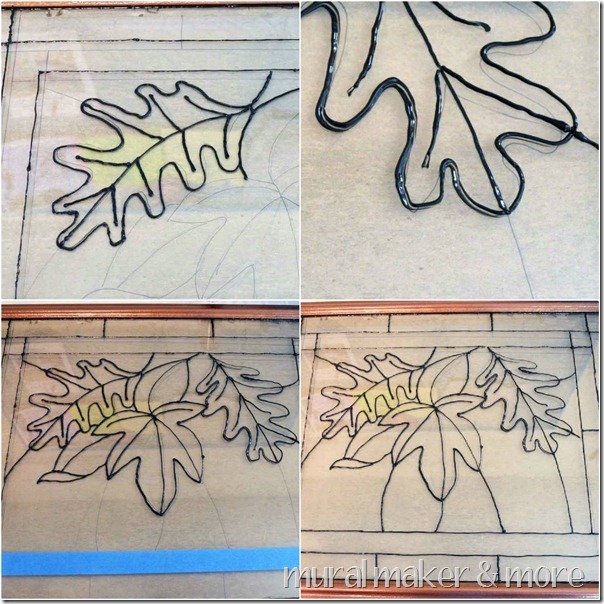
Now it’s time to trace the leaves with the leading. Notice how in the bottom left I still hadn’t poured that lower border yet.
On some of the leaves I extended the vein to connect to the borders. Why? To make it look like the background is in pieces, like real stained glass. It’s a subtle thing, but it’ll add some realism to your finished piece.
Alright! Now for the really fun stuff! Colors!
Mixing & Pouring Glass Stain Colors
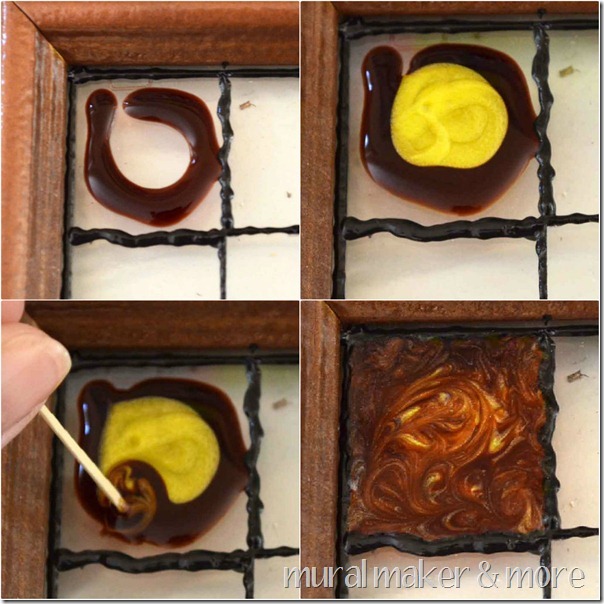
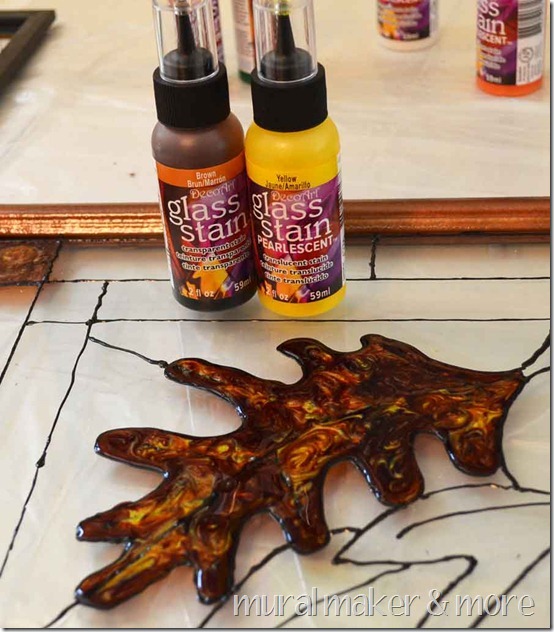
It’s so easy! Just squirt a little brown, then a little yellow, take a toothpick and swirl it all together. So much fun!
Couple of tips – “pull” the colors to the leading with your toothpick. As the paint dries it shrinks a bit, so you want to make sure you’ve completely filled the space in with color.
Also, the more you ‘swirl’ or move the stain, you might get some bubbles. Just take a clean toothpick and pop ‘em if you don’t like the look of bubbles.
That’s really all there is to it!
I found it more comfortable to work in smaller portions, rather than filling in an entire leaf.
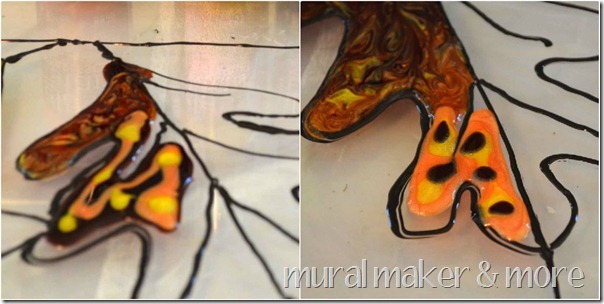
I got a little braver and added some Orange to the mix.
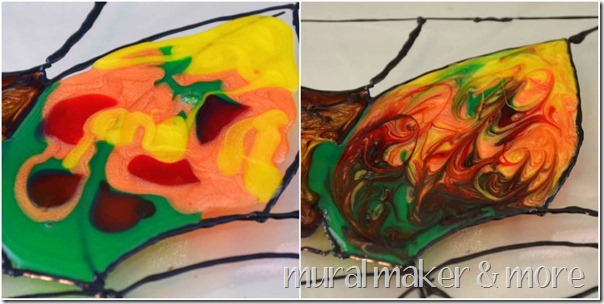
Then I really let loose and poured four or five colors in the small leaf.
Aren’t they pretty? And they’re not even dry yet. I could hardly wait to see what they’d look like with light shining through.
Be patient, and let them dry flat so your colors don’t run.
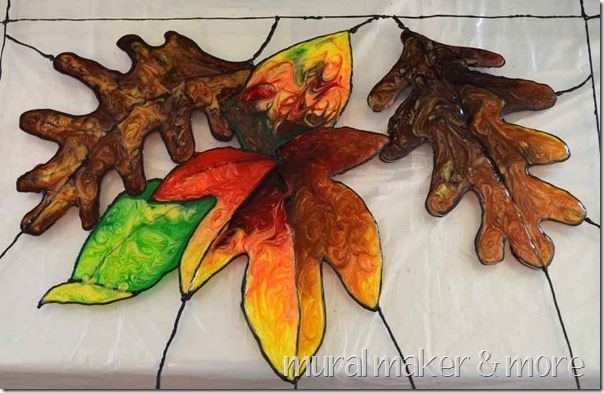
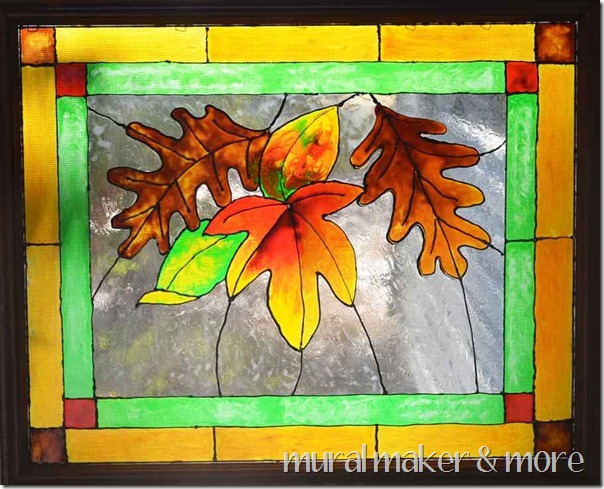
For the background I used Clear and a paintbrush to spread it around. The paintbrush adds a bit of texture so it looks like marbled glass.
For the inner border I poured Green + Clear. The outer border is Yellow + Orange with a couple drops of Brown. I swirled the colors together and then made long lines.
I’m not kidding, this is so much fun. I can’t wait to make something else!
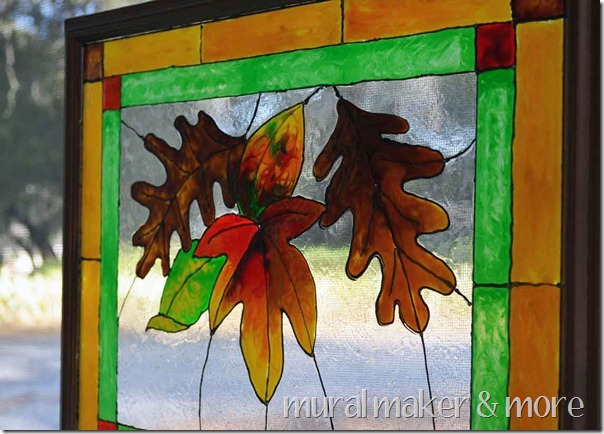
Can you see how the Clear background looks kind of marbled in this shot?
I love the sun shining thru all the colors. So pretty!
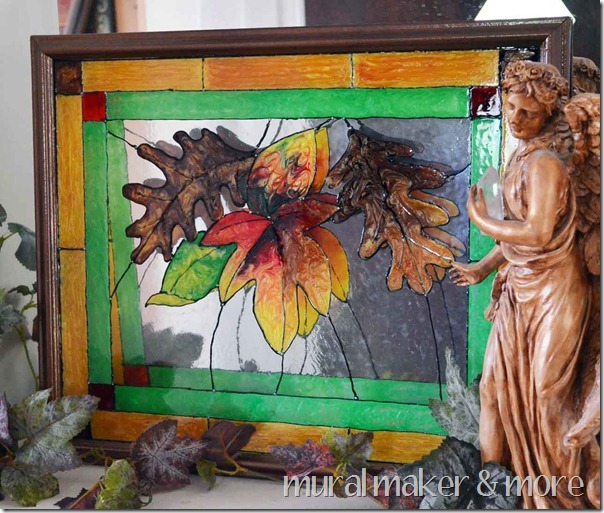
But, you know what? Even just set against a mirror, the colors are glorious.
I am in love with this product, DecoArt Glass Stains. I think you will be too! Wouldn’t it be fun for Halloween? And Christmas!?!
I wrote this post as part of a paid campaign. The opinions in this post are my own, as always.

That’s so beautiful! You’re so creative, Colleen! Your artwork absolutely made a difference to a simple glass window. You’re such a talented glass artist! I love your designs, especially this one. I could imagine how beautiful this window would look when the sun shined through it.
Herb Koguchi
I will definitely mimic this. So very creative and very unique many people inspires with you including me. window glass repair
This is absolutely perfect for me.
What a wonderful post! Thanks for sharing nice ideas. I was actually looking for some easy-to-do glass painting designs for clear jars and this just gave me an idea. Thanks1
Cheers xxx
Jess
Beautiful design! I’ve been doing stained glass panels for a few years, my largest was a 4x5ft, 4 panel weather break for my parents porch. While I was planning the large project I found a wonderful item to help with the straight lines of my pattern from gallery glass called redi lead, they are instant lead lines you can find in different widths and they are completely flexible so you can do curves and such. Great for people like me that cant draw a straight line to save her life
That’s what I call a glass window make-over! It turned from plain glass to an artsy décor. Problem with stained glass is, eventually, you may get tired of the design and they may not match the theme of your interiors when you change some furniture. But yes, they would be fun theme to have on holidays like Christmas or Halloween.
Merrill @ LoveYourWindows.com
You make it sound so simple! We are building a log home and I can’t wait to get started on some projects I have in mind for our house. What a fun way to spruce up the place! Thank you for the detailed tutorial!
Beyond home and auto glass, Glass Doctor offers unparalleled products and service for commercial glass needs from storefronts
to storerooms to front offices and beyond. In addition to Long Beach and Los Angeles, we also service Lakewood, Torrance,
Gardena, Palos Verdes Estates, and surrounding areas for your convenience. Call or stop in and let us help with your home,
commercial, or auto glass needs.
http://longbeach.glassdoctor.com/HomeGlassRepair/marina-del-rey-window-repair.html
SPAM! You suck! No one wants your commercial auto glass. We’re looking for stained glass tips, leech.
Love the mix of colors in the little leaf! How’d it look marbled btw? Is it because of the glass behind it? I think you can do this on your actual windows, but put a contact paper layer first so you can remove it easily if you don’t like the outcome or want to change it some time later.
Mary Martin
Waooow!!! Magnificent blogs, this is what I wanted to search. Thanks buddy
OC Window Experts
I love this! I was on the internet looking for ideas to see if I could make the glass panels on each side of our front door, stained glass. Do you think this could work?
Hi Brittany! Actually for glass that is already installed I’d recommend Gallery Glass, which is a liquid acrylic product. I’ve used it on lots of windows. Most craft stores carry it. It takes a little practice but it’s also forgiving in that you pour the shapes on a separate piece of mylar, let dry, then peel ‘n stick to your window. Here’s a project I did on sidelights a few years ago: http://justpaintitblog.com/2010/04/how-to-make-an-easy-window-mural/
Good luck and feel free to email me – muralmaker1@gmail.com – with any questions/concerns.
Hello! Love this project! Can I use clear fiberglass from home depot? coz I wanna cover a bigger area above my window. There’s a fairly large glass panel above my actual window & I would like to do a strained window effect without committing to one design. I wanna be able to change it out according to the season. Thanks!
Hey Rosie! You know, I’m not sure but I’m thinking the glass paint would work on fiberglass. I’d definitely do a test portion first but I think you’d be fine. Would love to see the finished project if you do!
~C.
This is lovely! Exactly the type of project I’m looking for What did you use to transfer the design onto the glass? I LOVE Sharpie markers, wondering if that is what you used.
Thank you!!
Hi Debbie, I’ve never tried markers directly on the glass. I do use them on copy or tracing paper, outlining the pattern, then place that paper under the glass. Does that make sense? You can see the pattern clearly without having anything on the glass so the paint will stick securely. Hope that helps.
Thanks so much!
~Colleen
Hi Debbie,
I am struggling to find a supplier of the paints and lead paint.
It is quite a few year since I have done this, but would like to have another go.
Hope you can help.
Joan
I used DecoArt Glass Stains and Leading. They’re available at Michael’s crafts or online. Let me know if you have problems finding them and I’ll direct you further.
Have fun!
~Colleen
I just called Micheal’s and they told me that they just closed out their stain glass materials so they are not available 09/28/16. Does anyone know where else to get stain glass paint?
DecoArt made the stained glass I use. I believe they have an online store or also try Amazon. I’ve also used Gallery Glass, much easier to use on a vertical surface, and it’s made by Plaid. I think Michael’s still carries Gallery Glass.
Good luck!
Great use of this paint. I love how you get it to fade from Brown to yellow in the center leaf.
Need some stained glass pattern ideas? Check out http://www.anypattern.com all patterns start at $1.99 and there are free ones as well.
What sort of price would you put on a piece like this?
Probably $125 or so. My concern would be shipping though since it’s glass. I could get a quote though, if you’re interested.
i thoroughly enjoyed your tutorial, and will be trying a cat for my first attempt, thanks so much
Hi Colleen! I can’t wait to do this! One question, how do you get the glass to stay securely in the frame without the board backing?
I didn’t have much of a problem, Sonia. I’ve done a few frames w/o backing and they’re all held in quite securely. I’d start with a smaller thrift store frame though, just til you get the hang of it.
Keep me posted!
Colleen
Thank you, Colleen, I will!
Hi, I love this idea! Could you please tell me how you secure the glass back inside the frame without the cardboard backing for support? Is it glued in?
Thanks!
can you do this technique on a door window, if the door is already installed?
Not with this product, Olivia. But there’s another one called “Gallery Glass”. Michael’s carries it, I believe. GG works great on installed windows and doors.
Allow yourself a little learning time though. It’s not hard, just different. But once you get it, no one will be able to tell it’s not real stained glass!
I don’t want to order paints on line. I live in West Australia, can someone please tell me where I can buy stock.
Great idea for my new blog post! Soon on line!
would this activity be available in the form of a lesson plan
Hi Margaret, sorry for the delay in replying. No, I only have it as a blog tutorial. I no longer have the glass paints so this is all I have. You might try googling a glass paint lesson plan and see what’s out there.
Hi your tutorial was very helpful. I have just started my second project and I love it. Still a little shaky hand when I do the leading as the lines are not perfectly even and a little bumpy. I have been using Gallery Glass do you know the difference between Gallery Glass and the Glass Paint that you used? Also on some projects that I have looked at I notice that the color look like they are fading or not uniform throughout giving them a different shade within the same color, and it looks stunning. Do you know if this technique happens by using more and/or less paint or by adding two similar colors? Thanks for your help
Hi. I’d like to do this on a couple of Windows . there’s a bird that keeps flying into my family room window. I’m a renter so I need something that I can easily remove. Would you suggest this for an actual WI ndow and do you know how I can remove it when I need to?
The products used here are not removable but you can use Gallery Glass to do the same thing. GG is like liquid acrylic so when it dries it’s easy to peel off when needed, but sticks well enough that you can clean with soft cloth. Hope this helps!
I love this! I’m doing a large project using plexiglass instead if glass. Do you know if the glass stain will work on that? Also, can you wash it without damaging the paint or is there a protective finish for it?
I’m almost certain it’ll work on plexiglass but you might want to try a sample in a corner or somewhere first. I don’t know about the washing though. I would think no, only a soft towel or ‘swiffer’. I’m unaware if there’s a protective finish for it. Mine lasted these past 6 years though without any issues. Have fun!
Colleen